Monday, June 27

Deep Fried Oreos - Guest Post

Hi there, Danielle has been working super hard this week on top of putting together a few new crafts so I volunteered to write up a guest post for her blog (I am such a super wonderful husband like that!). I do have a blog of my own, but I must admit that it is seldom interesting or updated.

One of my all time favorite activities is to go to the fair. Nothing beats spending a warm October day outside with friends and family indulging in some sensory overload. Growing up my family and I would frequent the North Carolina State Fair, and Danielle and I have, if you will excuse the pun, fairly recently started going to the Carolina Renaissance Festival together. No matter the type of fair, one of the highlights is always the food! Funnel Cakes, BBQ, Turkey Legs, Kettle Corn, Peanuts, Cotton Candy and the deep fried food of the year.

One thing I have learned going to fairs is that almost anything can be deep fried. Twinkies, Snickers, Coke, Butter, Cheeseburgers and even beer! One of my first deep fried fair food memories is the ever amazing deep fried oreo! This snack is so amazing I figured, why wait to indulge but just once a year, and set out to recreate it!

What is in here? Who knows, it could be anything!


Ingredients:
1 Package of Oreo Cookies
1 Cup of Pancake Mix
1 Large Egg
1 Cup of Milk (or water)
2 Teaspoons of Vegetable Oil
Peanut Oil (Depending on your frying apparatus)

Instructions:

-Heat up the peanut oil in your deep frying apparatus to about 375 degrees Fahrenheit. And no, you do not need to have a special deep fryer. You can just as easily use a deep skillet, you ideally need about 3-4 inches of oil in the skillet at minimum if you don't have a deep fryer.

-Add the Pancake Mix, Egg, Milk and Vegetable Oil in a medium mixing bowl and whisk until smooth.

-Dip the cookies into the batter, covering the cookie as much as possible and then carefully place into the oil. Continue until you have a batch of about 6 cookies frying at a time. You may need to adjust up or down depending on the size of your frying apparatus.


-Each batch should fry for 1 minute on each side until the batter turns golder brown. Remove the cookies from the fryer and let them drain on a paper towel.

-When you ready to serve, sprinkle some powdered sugar over the top of the cookies! And indulge!

One thing to keep in mind is that deep fried oreos do not make good leftovers, so plan ahead for how many you want to make, instead of making the whole bag (unless that is your plan).

They might not be pretty, but they are pretty dang good!


If you want to double your fun (and I don't mean by using double stuffs!) you could use this snack to help make a fun indoor fair day on a rainy day. Just add a few fun 'fair' games of skill/chance, some blue ribbon art contests and learning about the local livestock!

Saturday, June 25

Easy Tote

The last prize is finally complete. Hooray! Hopefully the next time I do a giveaway it won't take me so long to get all the prizes done.

The third and final prize winner is my bestest friend in the whole world's mother, Noel. She assured me that I didn't really have to make her anything. But I assured her I was going to, so if she had a suggestion she better give it to me. She gave me the idea for a tote bag.

Okay so I've made a few tote bags now. I needed a new challenge with the tote. So I decided this tote was going to be the easiest tote ever to make! Not that I didn't want to spend loads of time on Noel's prize. But I just decided randomly that this was going to be how I made this tote special.

Now how could I use what I have learned by making other totes to make one super quick and easy?


Wha-cha! Easy tote. Big enough to hold a few books or stack of papers. You can also fold it up small in your purse and whip it out to save a plastic bag at any store. I will gladly share with you some of the tricks I used to make this easy.


Tips

1. No lining
2. Body piece of fabric is one big panel
3. Straps have no interfacing
4. Top is turned under and sewed shut
5. Sides are sewed straight up
6. Patterned fabric hides the stitches that show on the right side of the fabric
7. No fancy pockets or closures

I love this idea for someone a quickie present. You could even use this as a gift bag and fill it with other exciting things.
Or I love this idea if you find a fabric you think is cute and a good deal at your local fabric store, look at their remenant bin or the sale fabrics. Depending on how big you want the tote, you only need around 1/2 yard of fabric.

Of course you can take all of the shortcuts and put them back into the construction and make something more complicated. But I can't promise its going to be more awesome! I just love how this bag turned out. I know Noel will appreciate the quick, easy and thriftiness of this bag!

Friday, June 24

Kid sized owl purse

Giveaway prize # 2 is complete. It will soon make its long journey to South Korea. Why you ask is it going halfway around the world? Well let me tell you...

The winner of this prize was Marshall (A Day in the Life). He is a proud solider in the USAF. He, his wife, Mary (Windshields and Rear-view Mirrors), and their two kids, Maddox and Maverick are stationed in South Korea. They have been over there for what seems like forever but its really only been since November 2010. They have been able to learn and live in a whole different culture. I envy their courage to travel and explore a foreign land.

When Marshall won the giveaway I was more than excited to make something for him. When I asked what kind of handcrafted do-da he wanted me to make him, his request was an owl purse for his daughter. I was secretly hoping to make her a cute gift. I mean what crafter doesn't want to make a cutesy present for an almost 4 year old girl? Although just for Marshall's information I did actually have some clever more manly ideas that Paul helped me come up with.

The journey to the owl purse was slightly epic, because my brand new sewing machine started malfunctioning after every other stitch. I spent most of last week throwing different objects around the apartment in utter frustration. I broke 2 needles in a matter of minutes. It was not a good time. I was very disappointed. I wanted to get this in the mail last week.

Thank goodness I was able to easily exchange the machine at the big box store I got it from. The new new sewing machine has, so far, been nothing but a dream machine. I was able to quickly finish sewing up the pieces I had already cut out. I sewed the face on halfway through. And BAM!


A child sized owl purse. I only wish I had someone's kid here to model it for me. I meant to take a picture that showed some scale, but maybe if I ask really nice I can get a picture of Maddox modeling it for me.


There is just enough room inside for a few little girly knick-knacks, which I'm assuming most little girls have the need to carry around with them.

I wish I could say something sweet like, 'I hope she likes this as much as I liked making it'... but I almost had to kill someone from frustration while making this because of my broken machine. So instead I'll say I hope she loves it, because I think its reaallly cute.

Maddox with her purse

Thursday, June 23

Shepard's Pie

I have fond memories of Shepard's Pie. But probably not for any reason you would think of...
So I'd like to tell you a little story before I get to the recipe part.

After living in Charlotte alone for over 6 months, Paul came to visit for Valentine's Day weekend. Since we were both pretty tight on money we decided that it would be more romantic for us to make dinner together at home. For some reason we thought that Shepherd's Pie was a romantic meal. 
After a long day of work at my new retail job, I was exhausted. So the meal went from cooking it together to mostly Paul cooking it. I wandered into the kitchen at one point and Paul kindly asked if me would get some sour cream and green onions from the fridge for him. I sauntered over and started to root around in the crisper for the onions. (That's where I would normally put them.) In annoyance from not finding what he had asked for, I turned to see Paul on one knee. My face burned with continued annoyance since I thought he was playing a mean joke on me. He asked again politely for the ingredients. So I turned back to the refrigerator to see the ring placed on the lowest shelf of the fridge. I just stood gasping as he proposed. I hugged him tight with tears in my eyes and said "Yes". (Of course.) The hug was long but Paul was still able to slip a hand out to continue to stir the meat that was browning on the stove.

This week I decided to find a reason to use these cute ramekins I bought a long time ago, Shepard's Pie seemed like the perfect thing to make. I found a recipe on Gina's Skinny Recipes, so I thought I'd give it a go.


Shepard's Pie


Potatoes:
  • 1-1/2 lbs Yukon Gold potatoes, peeled, diced
  • 3/4 cup fat free chicken broth
  • 2 tbsp fat free sour cream
  • salt and pepper
  • paprika
Filling:
  • 1 lb 95% lean ground beef
  • 1 tsp oil
  • 1 medium onion, diced
  • 1 celery stalk, chopped
  • 2 cloves garlic, diced
  • 8 oz mushrooms, diced (I didn't add these to mine.)
  • 10 oz frozen mixed vegetables (carrots, corn, peas, green beans, baby lima beans)
  • 2 tbsp flour
  • 1 cup fat free beef broth
  • 2 tsp tomato paste
  • 1 tsp Worcestershire sauce
  • 1 tsp freshly chopped rosemary leaves
  • 1 tsp freshly chopped dried thyme leaves
  • salt and pepper

Boil potatoes in water until cooked and soft. Drain and mash with chicken broth, sour cream, salt and pepper.
Preheat oven to 400°.
In a large saute pan brown meat. Season with salt and pepper. When cooked, set aside on a plate. Discard any fat in the pan, add oil, onion and garlic and sauté on medium heat about 2 minutes. Add mushrooms and celery and sauté another 3-4 minutes. Add flour, salt and pepper and mix well. Add frozen vegetables, beef broth, tomato paste, Worcestershire sauce, rosemary, thyme, chopped meat and mix well. Simmer on low about 5-10 minutes.
Spread the meat mixture on the bottom of a 11x7 glass baking dish (I made mine in two ramekins and a 9x9 dish). Top with mashed potatoes, using a fork to scrape the top to make ridges and sprinkle with paprika. Bake 20 minutes or until potatoes turn golden. Remove from oven and let it cool 10-15 minutes before serving.


So cute and so tasty.


Its nice to do memorable meals like this during special events, like anniversaries or Valentine's. But at the same time, why not do them year 'round? Tonight it made me reminisce about my wonderful proposal and appreciate my loving husband. And there is nothing wrong with that.


I hope you enjoyed my random story and I hope you will enjoy this tasty dish.


Make some memories of you own. ;)

Tuesday, June 21

Recipe box

When I first decided to do a giveaway, I had no definite ideas of what I wanted to giveaway. A lot of the stuff I have made are custom orders. So I waited to see who the winners were first. I thought this would be the best way to get people a prize they actually wanted.

The first winner was Kelly. She is the sister of one of my college roommates. When I sent out the message saying 'Hey you are a winner!' I then asked, what kind of prize would you like me to make for you? She commented that she loved to cook and anything to do with cooking would be great. The first thing that came to mind was a recipe book/box.


I got a box and cute note cards at Michael's craft store. Then I got to work writing up all kinds of recipes. I wanted to have at least one for every category. Main dishes were easy, but beverages were a lot harder to come up with. I wrote some of my favorites from my blog, my foodnetwork.com recipe box, and from the 10,000,000 recipe books that I own. I left a few blank note cards in the box for her to write up some of her own favorites.


I made sure to note if I had made the recipe before. That way she could have a heads up how easy or good it is. I noted on a few that they were special family dishes. I also put at the bottom of each where or who I got the recipe from. And I also tried not to use too many abbreviations. No matter how tempted I was. I did use T = tablespoon, t = teaspoon and c = cup. Give me a break, the note cards were small. When I did run out of room, I wrote a big arrow on the bottom to continue to the back.


This is a great gift for a wedding, going away, housewarming, birthday or Christmas present. I actually like this better then just giving a generic cookbook. It does take some time to write them all up by hand. I'm sure there is a way to print them on a computer, but I like the personal touch of writing it by hand.

I actually received a recipe book with handwritten recipes from my coworkers at Anthropologie when I was moving to Virginia. It meant a lot to me that they would not only buy the book, but each contribute a few recipes to each section.

The next time you need a gift for that hard to buy for person. Consider this idea!

Monday, June 20

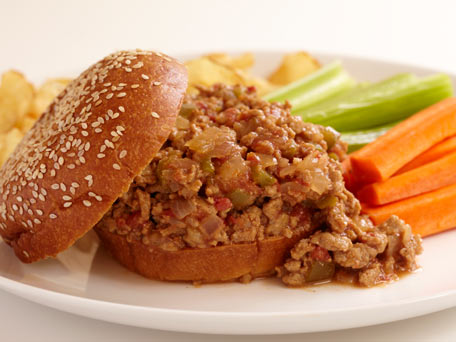
Sloppy Toms

After having turkey sloppy joes several times, Paul finally proposed a name changed for this meal. We quickly tossed some funny names around and decided on Sloppy Toms. Why not? Tom Turkey. Get it?

Okay well anyways. I wanted to share this recipe for a few reasons. One, sloppy joes are tasty, which I learned this fairly recently. My dad wasn't a fan, soooo this wasn't a meal that showed up on our menu in my childhood home. Two, turkey is a great substitute for those of us attempting to be healthy. Three, I love the way Rachel Ray wrote this recipe directly to a kid chef. This part is hard to describe so just take a look see.

Sloppy Toms

Ingredients

  • 2 tablespoons extra-virgin olive oil, 2 turns of the pan
  • 1 package, 1 1/3 pounds, ground turkey breast or lean ground turkey
  • 1/2 red onion
  • 1/2 red bell pepper
  • 1 tablespoon grill seasoning blend (recommended: McCormick Montreal Grill Seasoning or Mrs. Dash seasoning for poultry)
  • 2 tablespoons brown sugar
  • 1 tablespoon Worcestershire sauce
  • 1 cup tomato sauce,( 8- ounce) can
  • 4 buns
Have a GH (grown helper) place a big skillet over medium high heat for you. Use some kitchen scissors to cut the turkey package open. Add some extra-virgin olive oil, 2 turns of the pan in a nice, slow stream. Have the GH add the ground turkey to the pan, in case it spatters. Break the turkey up with a big wooden spoon as it starts to cook. If anyone touches the raw turkey, they should go wash their hands.

If you are a really good chopper, using a small, sharp knife chop up some red onion. Remember when you are chopping to keep the fingers that are not holding the knife all tucked in and curled under. Have a GH help you. You need half a red onion chopped up small. Pull the seeds and white membrane and the top out of a half red bell pepper and chop that up small too. Add the veggies to the cooking meat and stir it all together.

Next, mix in a small bowl: grill seasoning blend, brown sugar, Worcestershire sauce and the tomato sauce. This will make your special sauce. When all the ingredients are combined, pour the sauce evenly over the meat and stir everything together really well. Turn the heat down to simmer and cook the sloppy mixture for 10 minutes. Blow on a spoonful until cool and taste it to see if you need to adjust the seasoning.

Have the GH help you serve. Place a bun bottom on a plate. Use a big ice cream scoop to get a pile of sloppy meat onto the bun. Put bun top in place.

 
Keep in mind that getting kids involved with cooking will help them understand where food comes from and how its made. Hey who doesn't want their kids to appreciate the hard work that is put into the meals made for them?

This recipe is great to make with your kids, but is also just delicious in itself. Skip the calories and still get the sloppy goodness of this sandwich.

Saturday, June 18

Lasagna

Yeah I know I make a lot of pasta. But that's just because... well its so darn good. And affordable. And frankly easy. So when my friend Jessica (budding provisions) gave me a recipe for lasagna I was jazzed. The recipe is very BYOC (Be Your Own Chef) as Claire Robinson would say. Lasagna is one of those meals that you know what you like in it. This recipe helped me develop a technique to make a tasty lasagna. This way I can add the things I like in it and experiment a little too.

Lasagna

2 zucchini, chopped
1 eggplant, chopped
1 onion, chopped
olive oil
9 lasagna noodles
1 pot of marinara sauce
12 oz. ricotta cheese
1lb. shredded mozzeralla
1/2 teaspoon dried oregano
1/2 teaspoon dried basil
1/2 teaspoon garlic powder
1/4 cup Parmesan cheese
salt and pepper

Preheat oven to 400 degrees F. Roast zucchini, eggplant and onion on a baking sheet with oil, garlic powder, salt and pepper for 20-30 minutes.


Cook lasagna noodles to al dente and drain. Mix ricotta, 1/2 of mozzarella, oregano and basil together in a small bowl.


Layer in greased 9x13 baking dish: 1 cup sauce, 3 noodles, 1/2 cheese mixture, then 1 cup sauce, 3 noodles, roasted vegetables, and 3 noodles, 1 cup sauce, the rest of the cheese mixture. Then sprinkle with remaining mozzarella and Parmesan. Bake at 350 degrees F for 45 minutes covered with foil and last 10 minutes uncovered till browned.


Ohh so delicious. Like I said before BYOC. Try out other vegetables maybe spinach or squash. Or try some meat. You could brown up some ground beef or turkey or even Italian sausage. If your in a rush you can take a shortcut and get a jar of spaghetti sauce.

I hope this inspires you to take a shot at this classic casserole style pasta dish.

And don't forget to save a piece for leftovers.

Monday, June 13

Another day at the beach

For those of you that don't know I recently moved to the Charleston area. I have never lived so close to the beach. Although I have spent many years living in the beautiful Appalachian mountains. It's an interesting change of pace. I do miss the cool, crisp, peacefulness of the mountain. But the warm, sunny, exciting shoreline is pretty awesome to be near too.

I have never been closer than a 5 hour car trip to the beach. That made it a great destination for vacationing when I was a kid.

During those trips the best part about going to the beach was finding shells...


And making sandcastles.


When my sister and I got older the more complex they became. We would find shells and other sea junk to decorate them with. Sometimes we would make moats or pools and put tiny fish in them.


 We also fished on the shoreline, on the pier and on deep sea fishing expeditions.


We had old butterfly nets that we'd use to catch little bait fish for my dad to use on his big surf casting pole. Later on my sister got a really cool surf casting nets, that had little weights that would sink and trap small fish. That created hours of entertainment for the two of us.

We also did a lot of body surfing in the waves, we even got boogie boards one year. Sometimes we'd take our swimming noodles out and just bob in the waves.
Although I don't suppose I will be doing much of that anymore, since I saw two grey fins 30 feet from me in the water on Saturday. After I ran panicked from the water I was able to see they were just dolphins. But as far as I am concerned they were sharks when I was in the water.

The older I get the more my idea beach time fun has changed. One of my favorite things has become taking a walk with someone on the beach at sunrise to find shells. Early morning is really the only time to find good shells. They get picked through quickly through the day. If it storms that night before, you have an even better chance to find some interesting shells and sometimes sea creatures.


Mostly I just like enjoying the warm sun and lounging with friends and family digging my feet into the cool, moist sand.


I suppose just sitting quietly and reading a fun book would be fun for me now. After watching my mom do that for years, I feel like I am finally sophisticated enough to enjoy it as well.

Be sure to enjoy your vacation to the fullest! Whether its the mountains, beach or a big city.

If you already live in one of these places don't forget to enjoy it too! We are the lucky ones. Take advantage of living in a place that people spend hundreds of dollars to come visit.

Saturday, June 11

Pork chops with dijon herb sauce

For those of you out there looking for a tasty, simple dinner idea, here ya go.
In the past I wasn't a fan of a simple pork chop. I just couldn't find a recipe that really captured the great flavor and moistness of the chop. Finally I came upon this awesome blog that I am excited to share with everyone, Gina's Skinny Taste. So far I have been very impressed with the recipes from this blog, especially this one for pork chops.

Pork Chops with Dijon Herb Sauce

1 tsp butter
4 pork chops (22 oz with bone, fat removed), 1 inch thick, trim all visible fat
1/2 tsp salt
fresh ground pepper
3 tbsp chopped onion
3/4 cup fat free chicken stock
1 tbsp dijon mustard
2 tbsp chopped, fresh herbs like thyme, rosemary, parsley

In a large frying pan heat the butter over moderately low heat. Season pork with salt and pepper. Raise heat to medium and add the chops to the pan and sauté for 7 minutes. Turn and cook until chops are browned and done to medium, about 7-8 minutes longer. Remove the chops and put in a warm spot.
Add the onion to the pan and cook, stirring, until soft, about 3 minutes. Add the stock and boil until it reduces to 1/2 cup, about 3 minutes. Stir in the mustard, herbs, and 1/8 tsp pepper. Put the chops on a platter and pour the sauce over the meat.


A variation of this recipe is Pork chops with mushrooms and shallots. Same idea different ingredients.


I have made this dish several times and we always enjoy it.

Try it for yourself it might become your new go to pork chop recipe too.

Thursday, June 9

GIVEAWAY TIME!

It's time for a GIVEAWAY!!!!!!

In celebration of surpassing 500 views on my blog. I wanted to giveaway a thank you to my loyal viewers. Between now and through the weekend, I'll be taking comments on this post as and entry to my giveaway drawing.

Rules and prizes:
You can comment once a day till Sunday June 12, 2011 in the evening. Each time you comment I will throw your name in to my hat and at the end I will do a drawing for 3 amazing prizes!

I haven't 100% decided what this prizes will be yet. Keep in mind that they will be something crafty, handmade and awesome. They might be some crafts I have included in my blog, or maybe some new things I've been wanting to try.

I will contact the winners to mail them their prizes as soon as I can.

I look forward to seeing the all comments! I know ya'll are reading, so be sure to comment to get your reward!

I'll leave you with a picture of my cat doing something cute. It doesn't happen often so feel privileged you get to see it. HA!

Wednesday, June 8

DIY Jewelry Cleaning and Repair

My mom has loved to keep cute things from my childhood. One thing she has held on all these years is my "kid jewelry". Sweet little necklaces, charms, and rings. All right so I may never wear these things again, but that doesn't mean that I don't want them to look nice. Or I might be able to incorporate them into some vintage look.

 Everything was so tarnished and sad. So I whipped out my trusty Tarnax and cleaning cloth.


I love the satisfaction I get from wiping away years of tarnish off of a favorite old charm.


Just a few moments of rubbing on the solution and the shine came right back. I rinsed and dried each piece. Then for a convenient and safe storage I put each item into a plastic baggie. I used some old button baggies, my mom saved off of some new blouses. The plastic keeps the pieces safe from new tarnish forming and keeps them from doing the tangle tango in my jewelry box.


Now they are clean and ready for whenever I want to wear or share these pieces.


I also took the time to put some charms on my charm bracelet. I'm not big on wearing bracelets but its nice to know its good to go if I ever want to. All it took was a few o-rings and some needle nosed pliers. Years of the charms sitting loosely in a box, now have finally been put in their rightful place.

Lastly while I had out my findings I found some fishhook earring posts. I took a few more minutes and switched out some old fishhooks on some costume jewelry.


I have found that no matter how hard you scrub the cheap-o jewelry, the tarnish never comes off. I can't help myself though, I love my old Claire's jewelry. So instead of chucking it, I just refurbished it. Now the posts won't tarnish my ears when I wear them.

Just because I accomplished a lot doesn't mean I spent all afternoon doing it. I really only worked on this project for about 30 minutes. Now I have new earring posts for 2 sets of earrings, cleaned up almost a dozen pieces of jewelry and hooked up my long lost charms to their bracelet.

Yeah I could have just concentrated on whatever program I had on TV and just lounged on the sofa. But why not be productive while watching TV or listening to some tunes. It did make me feel great to get those relics of my past spruced up.

So why not pull out your old jewels. Get them organized, cleaned up, and repaired. Do it yourself and save a few dollars.

You might find something you forgot all about. Or clean up a gem you didn't realize was so awesome!

Monday, June 6

Gone Fishing

My immediate family includes my mom, dad, my sister and me. After having his final child, my dad decided that having only girls wasn't going to stop him from teaching his kids about all the great things he loved to do growing up. These things quickly became wonderful memories and fun past times for my sister and me.

One of our favorite things to do with our dad was going fishing!


He started us young. We went fishing in rivers...


Lakes...


At the beach...


Or in the deep sea.
We caught all kinds of fishes. Little ones. And big ones.


From cobia, Spanish mackerel, blue gills, bass, trout to pikes. We loved to catch everything. 
I always felt like I was learning something so special from my dad, when he would show me how to tie the best knot or technique for casting. 
He even taught me how to put a worm on a hook. 
Hey that's a big deal to a little girl...

I loved when he would take the fish off the line for me. Once I got a certain age, he would show me how to do that too.


You will notice that the little blonde girl, Lindsay, is wearing a pink polo in almost every picture. That was her special catfish shirt. It was a lucky charm she liked to wear whenever we went fishing. 

Sometime we would even catch our own bait fish and dig up worms to use.


We always had a blast going out with my dad to find the perfect fishing spot and catching all kinds of fishes. Then we would trudge home, smelly and tired. My mom would have a big smile on her face excited to see what we caught for dinner. Then no matter how tired we were we would help my dad scale and clean the fish up. It was yucky and gross but it is part of fishing. Then we would enjoy our catch, usually fried up with a crispy, cornmeal batter.

I will never forget those moments I spent sitting next to my dad on the bank of the lake or on the edge of a boat.

Don't let gender stereotypes stop you from spending time with your loved ones. You never know what your kids will be into.
Go out and experience life! 

Go fishing!


Thursday, June 2

Upcoming Posts

I spent the weekend at my parent's new house. I was able to digitize some photos from my childhood.

So... I now have more ideas of family traditions, recipes, places to go, things to do, and some crafts.

My fear is that all of my posts might not fit in the general theme of my idea blog. They might end up being a chronicle of cool things I did when I was a kid. My hope is that someone somewhere will be able to glean some ideas.

There is an idea here too. Using blog to chronicle your life. Whether it is current life, in the past or future hopes and dreams. You can share them with everyone, your family, friends or just have them for yourself. If you have access to a scanner you can digitize old photos and journal them in a blog. If this is something you are interested in doing, remember to do it sooner than later. You don't want to forget the fun facts and memories from the pictures.

If you all remember I did a post about my family tradition of Birthday Waffles.  Now I finally have the childhood pictures to share.


I hope you all came forgive the terrible fashions of the 80s and 90s. And my big glasses. I am still blind as a bat in the daylight, but now I have more sleek contacts.

What do you think about the idea of chronicling you life in a blog? Once you get going you will get addicted. Even if you don't intend anyone else to read it. Memories are fun.