Showing posts with label Organization. Show all posts

Wednesday, January 16

Upholstered Trunk

Waaay back in the summer even before we moved into our new house (back when it was still new), my mother in law gifted me a project that she had all but given up on. Sad to see such a project go by the way side I adopted it.

We brought it to our new home and it sat forlornly in my garage for a few more months before I got up the courage to start on the project myself.

I had so many ideas but I was nervous about getting started. Finally I decided one week that it was going to be my mission to get this project completed!

I had already decided where it was going in my house. (It's kind of an unspoken rule in our family that we have to know where something is going before bringing it home.)

I already knew what color I wanted to paint it. I wasn't sure about the fabric for the top. But since it was going in our bedroom I wanted it to at least complement if not match the current linens.

The hardest part was gathering all the materials needed to complete the project. And boy let me tell you these little things really add up. Especially if you don't buy the right yardage of foam and have to go back and get more. (Although I already have another plan for the shorter piece of foam.)

I really need to remember the old saying "Measure twice, cut once."

Materials:

Top:
Upholstery Fabric
1/4" Foam
Fabric tacks
Screws

Base:
Primer
Semi-gloss paint
Brush
Paint Thinner

The top came separately from the base. So the first step was to do a coat of the primer on the base. I decided it would be easier to paint the entire bottom rather then trying to figure out what bits would show and what would not.


 I also used a pinterest idea for the paint can. I used a rubber band around the can to drag the brush across to remove excess paint. It worked well except when you have to take it off. Then it pops and sprays paint everywhere. So either way you are getting paint on yourself. That's just how painting is...


I did one coat of primer on the entire exterior of the trunk. I didn't find it necessary to do the inside. If you were restoring an old trunk then it might be a good idea.


After I was satisfied that it was dry, I moved on to the paint. I got a dark grey semi-gloss paint. It was hard to find a black-black to match my bedroom furniture so I went I little lighter hoping it wouldn't clash too much.


The first coat went on slow but the second was much quicker. I was glad to be done with the painting. That to me was the most stressful part. I hate making such a mess. Actually making the mess isn't the problem it's the cleaning up that I dislike.

On to the top of the trunk. This part was what I was looking forward to. I had never done any upholstering. I read all kinds of blogs with tips, tricks and tutorials. But in the end I decided to do it my way. The kind of lazy, cheap, half-butted way I like to do things.


Choosing the fabric and foam was a long process. I went to two different fabric stores with a very patient friend. I wanted something that would last, not too trendy, something that would go with my linens but not be matchy-matchy. I decided to go with this old postage stamp look. Something about it just called out to me. I kept walking back to it in the store. Looking again and again. I'm sure I was driving my patient friend crazy. But I was happy with my selection once I left.

All I did was cut the foam to line up with the edges of the top. Then I cut the extreme excess off the fabric then draped around the edge of the top. I used fabric tacks to secure each corner. I went on side at a time and clipped off the extra fabric as I made my way around the underside of the top of the trunk.


I added more and more tacks. Till the top was secure and tight. I decided not to get too fancy and roll the edges under. I liked the worn look. And that's a lot more effort. I am lazy after all.


The last thing to do I requested help from my lovely husband. I had to screw on the top to the base.  It came with all the hardware. We just had to carefully line everything up and get the screws in the right place.

He carried it inside for me and sat it in front of my bed where I had imagined that it was going to sit.


I was very pleased with the final result.


So was the cat. He loves to sleep at the end of our bed. I just knew he would love the extra foot of space to stretch out and not be kicked accidentally at night. Because we have such a low set bed he is able to walk back and forth between the two surfaces. It's definitely his favorite project I have ever done. 

Whatever I can do to please the cat, I suppose.
Ha.

I really love my custom trunk. Thanks to those who encouraged and badgered me to get this project complete and to my mother in law to gifting me such a great project that I can be proud of for years to come.

Good luck on your next big project!

Tuesday, June 21

Recipe box

When I first decided to do a giveaway, I had no definite ideas of what I wanted to giveaway. A lot of the stuff I have made are custom orders. So I waited to see who the winners were first. I thought this would be the best way to get people a prize they actually wanted.

The first winner was Kelly. She is the sister of one of my college roommates. When I sent out the message saying 'Hey you are a winner!' I then asked, what kind of prize would you like me to make for you? She commented that she loved to cook and anything to do with cooking would be great. The first thing that came to mind was a recipe book/box.


I got a box and cute note cards at Michael's craft store. Then I got to work writing up all kinds of recipes. I wanted to have at least one for every category. Main dishes were easy, but beverages were a lot harder to come up with. I wrote some of my favorites from my blog, my foodnetwork.com recipe box, and from the 10,000,000 recipe books that I own. I left a few blank note cards in the box for her to write up some of her own favorites.


I made sure to note if I had made the recipe before. That way she could have a heads up how easy or good it is. I noted on a few that they were special family dishes. I also put at the bottom of each where or who I got the recipe from. And I also tried not to use too many abbreviations. No matter how tempted I was. I did use T = tablespoon, t = teaspoon and c = cup. Give me a break, the note cards were small. When I did run out of room, I wrote a big arrow on the bottom to continue to the back.


This is a great gift for a wedding, going away, housewarming, birthday or Christmas present. I actually like this better then just giving a generic cookbook. It does take some time to write them all up by hand. I'm sure there is a way to print them on a computer, but I like the personal touch of writing it by hand.

I actually received a recipe book with handwritten recipes from my coworkers at Anthropologie when I was moving to Virginia. It meant a lot to me that they would not only buy the book, but each contribute a few recipes to each section.

The next time you need a gift for that hard to buy for person. Consider this idea!

Wednesday, June 8

DIY Jewelry Cleaning and Repair

My mom has loved to keep cute things from my childhood. One thing she has held on all these years is my "kid jewelry". Sweet little necklaces, charms, and rings. All right so I may never wear these things again, but that doesn't mean that I don't want them to look nice. Or I might be able to incorporate them into some vintage look.

 Everything was so tarnished and sad. So I whipped out my trusty Tarnax and cleaning cloth.


I love the satisfaction I get from wiping away years of tarnish off of a favorite old charm.


Just a few moments of rubbing on the solution and the shine came right back. I rinsed and dried each piece. Then for a convenient and safe storage I put each item into a plastic baggie. I used some old button baggies, my mom saved off of some new blouses. The plastic keeps the pieces safe from new tarnish forming and keeps them from doing the tangle tango in my jewelry box.


Now they are clean and ready for whenever I want to wear or share these pieces.


I also took the time to put some charms on my charm bracelet. I'm not big on wearing bracelets but its nice to know its good to go if I ever want to. All it took was a few o-rings and some needle nosed pliers. Years of the charms sitting loosely in a box, now have finally been put in their rightful place.

Lastly while I had out my findings I found some fishhook earring posts. I took a few more minutes and switched out some old fishhooks on some costume jewelry.


I have found that no matter how hard you scrub the cheap-o jewelry, the tarnish never comes off. I can't help myself though, I love my old Claire's jewelry. So instead of chucking it, I just refurbished it. Now the posts won't tarnish my ears when I wear them.

Just because I accomplished a lot doesn't mean I spent all afternoon doing it. I really only worked on this project for about 30 minutes. Now I have new earring posts for 2 sets of earrings, cleaned up almost a dozen pieces of jewelry and hooked up my long lost charms to their bracelet.

Yeah I could have just concentrated on whatever program I had on TV and just lounged on the sofa. But why not be productive while watching TV or listening to some tunes. It did make me feel great to get those relics of my past spruced up.

So why not pull out your old jewels. Get them organized, cleaned up, and repaired. Do it yourself and save a few dollars.

You might find something you forgot all about. Or clean up a gem you didn't realize was so awesome!

Sunday, April 17

Organize Dinnertime

This post is meant to be an organizational idea. A way to make that "What's for dinner?" question a little less painful. And an attempt to make grocery shopping slightly more tolerable.

To make my grocery shopping life a bit easier there are some things that I try to buy in bulk:
Chicken breasts
Canned tomato products - paste, diced, sauce
Spaghetti
Olive oil
Popcorn
I see these particular items as necessities that deserve the space they take up in my pantry/freezer.  Its nice to know I can always pop a bag of popcorn. Simple things like this are a comfort on a stressful day.
I also like to have a few "go to" meals, such as spaghetti with marinara or grilled chicken breasts. These items are also a base for many meals.
Basically watch what kinds of things you buy EVERY single week. Get them in bulk. Big cereal eater? Bulk it out. Epic coffee drinker? Go bulk! Buy smart, just be careful don't be wasteful.

One of the greatest allies in my dinnertime successes is my "Chow Planning" pad.


A few bucks at Target bought me weeks of organization. This is a night by night planner with enough room in each day to write the main dish and sides! Also at the bottom there is a place to write up a grocery list. Take the whole thing with you to the grocery and don't forget anything for any recipe ever again. Reducing those needless trips to the grocery store to pick up that one thing you forgot, where you come out with three bags of stuff you saw you might need. Ugh.
Maybe everyone is not as passionate about saving time and money as I am... wait who here doesn't want to save time and money? Really?

Every weekend I write on the back of the previous week's list ideas for the coming week's dinners. (Just to save a piece of paper. Or start a dry erase boards with ideas throughout the week.) I try to have a few cookbooks out and sit next to my computer for internet access with a couple of my favorite foodie websites on screen. (Also employ your grocery store's ads, this will give you ideas while save money.)
After coming up with 7 excellent ideas I will compare the difficulty of preparation (leave the easy stuff for a long day and time intensive meals for your day off) and freshness of ingredients (cook fresh fish early in the week) to my schedule. This gives me the most accurate reading on what night to cook what.


 Okay that might sound complicated. But trust me its a lot less work then trying to scrounge together miscellaneous ingredients for dinner every night.

Get the family involved in coming up with ideas and get suggestions on when they would like to eat those meals. If you try this method you will have a lot less waste and a lot less arguments about meal ideas.

There are still some nights that things don't work out and we end up going out to eat or ordering in. Then I end up shuffling the meal planner around. But in the end I know I have the food to make those meals later. It's very comforting.

You don't need some fancy pad of paper with the days of the week printed on it. That's just for funsies. Take 30 minutes or an hour of time, then have your grocery list done and a full week's worth of dinner ideas ready prepared for the week ahead!

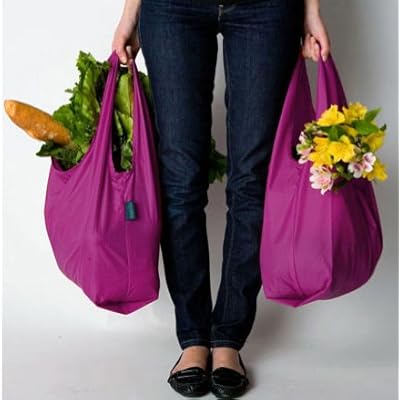
And don't forget your reusable bags for the grocery store.