This is my idea station. So you never know what you will find that you can use in your life.
Showing posts with label Sewing Projects. Show all posts
Friday, March 14
Simple Sew Napkins
I know this post seems really out of timeline. But I was browsing around in my pictures and forgot that I had made a photo journal of this project so I wanted share. I am always looking for quick easy projects to do on a quiet afternoon and this one really fit the bill. A while back I found a really cute patterned remnant with some adorable turkeys on it at my local Hancock Fabrics.
I decided the best use for the small piece of fabric would be to make some napkins for my next Thanksgiving feast. But how!?
This simple project starts off by equally cutting down the fabric by folding it over and over until I had a reasonable napkin sized square.
Then I picked two pieces and put them "wrong side" together.
I did a quick running stitch on my sewing machine on 3 of the 4 sides.
I didn't even have to pin down the edges which was nice because I made 8 napkins.
I turned the fabric outside in and ironed the sides smooth. The last step is just as easy...
A running stitch around the whole edge and you're done!
Be sure to wash before you use them. You don't even want to know how many chemicals are sprayed on fabrics that come into the country. Ugh.
I made mine on the small side. In hindsight I could probably have made them longer/wider. But that's how you learn is by trying and... failing. (Not that I would call this a particularly big error.)
So the next time you see a cutie remnant or you trying to decide how to make your table-scape a bit more festival don't forget even you can sew up a few napkins to add to your collection.
Wednesday, January 16
Christmas Tree Skirt
I always have all these ideas for Christmas-y fun, decor and foods. This year would be the first year in our new home. I knew that I needed to do something special.
I remembered my old tattered, felt tree skirt that I had bought for a few dollars years before in my first apartment after college. It DID have a laser cut edge that was cut to look like poinsettias.
I say did because I don't think it made it through one Christmas before my cat had chewed and clawed the decorative edge to bits.
Rolling my eyes I knew that I should not do anything too fancy, expensive, or intricate because it most likely would not survive the wrath of my beast. So I decided to keep it simple, which was more my style any ways.
I sought out the help of pinterest. I knew that I would be able to find loads of ideas. And boy did I. Too many. I had narrowed it down and finally for final decision I deferred to my husband. I wanted it to be special for him too. He chose this tree skirt.
At first I was not sure how to proceed since it was only a picture with no tutorial. I got some advice from for mentioned patient friend and read other tutorials with similar results.
This project was going to take a lot of felt and a lot of hot glue.
I first cut off the destroyed edge of my old tree skirt. No need for the good part to go to waste.
Then I used half of the top of a Christmas ribbon spool to fashion a scalloped edge template. Clever I know... some of the most clever ideas come from being super thrifty.
Then I cut... a lot. I decided on layering 4 colors to give the skirt some extra width. I got a 1/4 of a yard of red, white, light green and dark green. I actually only used a 1/8 of a yard but I found a good home for the remaining fabric.
Once I got done cutting it was time for all that hot gluing. I did not do a lot of pinning things. I just started gluing and layering the rings. It made it a little uneven at the backside. But you do not normally see that side and it saved me a lot of time and aggravation.
Then POW done.
It was actually a pretty easy project. I was very happy with how it turned out. Festive but not over the top. Definitely gave good dimension to our first Christmas tree in our new house. And it was almost big enough of all of our presents. Almost...
I hope everyone had a lovely holiday season. I know I did.
I remembered my old tattered, felt tree skirt that I had bought for a few dollars years before in my first apartment after college. It DID have a laser cut edge that was cut to look like poinsettias.
I say did because I don't think it made it through one Christmas before my cat had chewed and clawed the decorative edge to bits.
Rolling my eyes I knew that I should not do anything too fancy, expensive, or intricate because it most likely would not survive the wrath of my beast. So I decided to keep it simple, which was more my style any ways.
I sought out the help of pinterest. I knew that I would be able to find loads of ideas. And boy did I. Too many. I had narrowed it down and finally for final decision I deferred to my husband. I wanted it to be special for him too. He chose this tree skirt.
At first I was not sure how to proceed since it was only a picture with no tutorial. I got some advice from for mentioned patient friend and read other tutorials with similar results.
This project was going to take a lot of felt and a lot of hot glue.
I first cut off the destroyed edge of my old tree skirt. No need for the good part to go to waste.
Then I used half of the top of a Christmas ribbon spool to fashion a scalloped edge template. Clever I know... some of the most clever ideas come from being super thrifty.
Then I cut... a lot. I decided on layering 4 colors to give the skirt some extra width. I got a 1/4 of a yard of red, white, light green and dark green. I actually only used a 1/8 of a yard but I found a good home for the remaining fabric.
Once I got done cutting it was time for all that hot gluing. I did not do a lot of pinning things. I just started gluing and layering the rings. It made it a little uneven at the backside. But you do not normally see that side and it saved me a lot of time and aggravation.
Then POW done.
It was actually a pretty easy project. I was very happy with how it turned out. Festive but not over the top. Definitely gave good dimension to our first Christmas tree in our new house. And it was almost big enough of all of our presents. Almost...
I hope everyone had a lovely holiday season. I know I did.
Upholstered Trunk
Waaay back in the summer even before we moved into our new house (back when it was still new), my mother in law gifted me a project that she had all but given up on. Sad to see such a project go by the way side I adopted it.
We brought it to our new home and it sat forlornly in my garage for a few more months before I got up the courage to start on the project myself.
I had so many ideas but I was nervous about getting started. Finally I decided one week that it was going to be my mission to get this project completed!
I had already decided where it was going in my house. (It's kind of an unspoken rule in our family that we have to know where something is going before bringing it home.)
I already knew what color I wanted to paint it. I wasn't sure about the fabric for the top. But since it was going in our bedroom I wanted it to at least complement if not match the current linens.
The hardest part was gathering all the materials needed to complete the project. And boy let me tell you these little things really add up. Especially if you don't buy the right yardage of foam and have to go back and get more. (Although I already have another plan for the shorter piece of foam.)
I really need to remember the old saying "Measure twice, cut once."
Materials:
Top:
Upholstery Fabric
1/4" Foam
Fabric tacks
Screws
Base:
Primer
Semi-gloss paint
Brush
Paint Thinner
The top came separately from the base. So the first step was to do a coat of the primer on the base. I decided it would be easier to paint the entire bottom rather then trying to figure out what bits would show and what would not.
Choosing the fabric and foam was a long process. I went to two different fabric stores with a very patient friend. I wanted something that would last, not too trendy, something that would go with my linens but not be matchy-matchy. I decided to go with this old postage stamp look. Something about it just called out to me. I kept walking back to it in the store. Looking again and again. I'm sure I was driving my patient friend crazy. But I was happy with my selection once I left.
All I did was cut the foam to line up with the edges of the top. Then I cut the extreme excess off the fabric then draped around the edge of the top. I used fabric tacks to secure each corner. I went on side at a time and clipped off the extra fabric as I made my way around the underside of the top of the trunk.
I added more and more tacks. Till the top was secure and tight. I decided not to get too fancy and roll the edges under. I liked the worn look. And that's a lot more effort. I am lazy after all.
We brought it to our new home and it sat forlornly in my garage for a few more months before I got up the courage to start on the project myself.
I had so many ideas but I was nervous about getting started. Finally I decided one week that it was going to be my mission to get this project completed!
I had already decided where it was going in my house. (It's kind of an unspoken rule in our family that we have to know where something is going before bringing it home.)
I already knew what color I wanted to paint it. I wasn't sure about the fabric for the top. But since it was going in our bedroom I wanted it to at least complement if not match the current linens.
The hardest part was gathering all the materials needed to complete the project. And boy let me tell you these little things really add up. Especially if you don't buy the right yardage of foam and have to go back and get more. (Although I already have another plan for the shorter piece of foam.)
I really need to remember the old saying "Measure twice, cut once."
Materials:
Top:
Upholstery Fabric
1/4" Foam
Fabric tacks
Screws
Base:
Primer
Semi-gloss paint
Brush
Paint Thinner
The top came separately from the base. So the first step was to do a coat of the primer on the base. I decided it would be easier to paint the entire bottom rather then trying to figure out what bits would show and what would not.
I also used a pinterest idea for the paint can. I used a rubber band around the can to drag the brush across to remove excess paint. It worked well except when you have to take it off. Then it pops and sprays paint everywhere. So either way you are getting paint on yourself. That's just how painting is...
I did one coat of primer on the entire exterior of the trunk. I didn't find it necessary to do the inside. If you were restoring an old trunk then it might be a good idea.
After I was satisfied that it was dry, I moved on to the paint. I got a dark grey semi-gloss paint. It was hard to find a black-black to match my bedroom furniture so I went I little lighter hoping it wouldn't clash too much.
The first coat went on slow but the second was much quicker. I was glad to be done with the painting. That to me was the most stressful part. I hate making such a mess. Actually making the mess isn't the problem it's the cleaning up that I dislike.
On to the top of the trunk. This part was what I was looking forward to. I had never done any upholstering. I read all kinds of blogs with tips, tricks and tutorials. But in the end I decided to do it my way. The kind of lazy, cheap, half-butted way I like to do things.
Choosing the fabric and foam was a long process. I went to two different fabric stores with a very patient friend. I wanted something that would last, not too trendy, something that would go with my linens but not be matchy-matchy. I decided to go with this old postage stamp look. Something about it just called out to me. I kept walking back to it in the store. Looking again and again. I'm sure I was driving my patient friend crazy. But I was happy with my selection once I left.
All I did was cut the foam to line up with the edges of the top. Then I cut the extreme excess off the fabric then draped around the edge of the top. I used fabric tacks to secure each corner. I went on side at a time and clipped off the extra fabric as I made my way around the underside of the top of the trunk.
I added more and more tacks. Till the top was secure and tight. I decided not to get too fancy and roll the edges under. I liked the worn look. And that's a lot more effort. I am lazy after all.
The last thing to do I requested help from my lovely husband. I had to screw on the top to the base. It came with all the hardware. We just had to carefully line everything up and get the screws in the right place.
He carried it inside for me and sat it in front of my bed where I had imagined that it was going to sit.
I was very pleased with the final result.
So was the cat. He loves to sleep at the end of our bed. I just knew he would love the extra foot of space to stretch out and not be kicked accidentally at night. Because we have such a low set bed he is able to walk back and forth between the two surfaces. It's definitely his favorite project I have ever done.
Whatever I can do to please the cat, I suppose.
Ha.
I really love my custom trunk. Thanks to those who encouraged and badgered me to get this project complete and to my mother in law to gifting me such a great project that I can be proud of for years to come.
Good luck on your next big project!
Monday, March 12
Baby Shower Gift Ideas - Diapies!
So first off sorry for the unintended and unwanted hiatus from posting. But don't worry just because I have not been posting my crafting and cooking definitely does not mean that I have been idle finding and producing new ideas.
I think the first I would like to share is some excellent ideas for a baby shower gifts. (I also have another idea in progress, thanks to my mom, that I will hopefully complete soon.)
The first one I can take no credit for, my friend Jessica made these for her first baby. Probably because she couldn't find any burp clothes that were stylish enough for her little boy. Plus she is an insatiable crafter just like me!
These are what she named "Diapies"! Because they are made from pre-fold cloth diapers.
This whole process could not be simpler and more fun!
(Well picking out the fabric is my personal favorite part.)
I asked the mom to be what her nursery or baby colors or pattern preferences were. She told me "cupcakes, butterflies, pink and ponies". So this is what I came up with...
12 diapies with 3 patterned fabrics. I even remembered to laundry them before I gift wrapped them!
This is a view of them unfolded to show you how huge they are! Big enough to protect any shoulder from the occasional to not so occasional post feeding spit up. Trust me they were very well tested with my friend's baby and they work awesome. And not just for burp clothes but the random spill cleaner upper or make shift bib even. I'm sure there are tons of uses but that is all I can come up with at the moment...
Sure you could just buy the pack of pre-fold diapers and call them diapies, but without that extra cute fabric touch its just not the same.
I promise its an easy sew.
This will not be an unwanted gift. Even a first time mother will appreciate the need for a good set of burp clothes. And no one else will have brought any quite like it. Even if you have super crafty friends, the chances of picking the same fabric are almost 0%, really.
But I'm not done yet! I bought an extra pattern of fabric, because it was so darn cute, while getting fabric for the diapies. Then I suddenly realized, "What am I going to do with this?!"
I searched the internet and etsy even pinterest looking for ideas. Then standing in a craft store I remembered seeing a project on Little Miss Momma a while back featuring a fabric memo board. Okay I can do this. Trying to remember what I need from looking at this post about 3 months ago, I bought corkboard and ribbon and found a few cute buttons in my stash. When I actually looked up the post, it was not at all how she made it, so from there is became my own creation.
So I gave you not 1 not 2 but 3 ideas for do it yourself baby shower gifts. I expect you people to get out there and start sewing for your mom and dad to be friends!
Or at least appreciate these cute ideas and smile when you look at the adorable fabrics.
I think the first I would like to share is some excellent ideas for a baby shower gifts. (I also have another idea in progress, thanks to my mom, that I will hopefully complete soon.)
The first one I can take no credit for, my friend Jessica made these for her first baby. Probably because she couldn't find any burp clothes that were stylish enough for her little boy. Plus she is an insatiable crafter just like me!
These are what she named "Diapies"! Because they are made from pre-fold cloth diapers.
This whole process could not be simpler and more fun!
(Well picking out the fabric is my personal favorite part.)
I asked the mom to be what her nursery or baby colors or pattern preferences were. She told me "cupcakes, butterflies, pink and ponies". So this is what I came up with...
12 diapies with 3 patterned fabrics. I even remembered to laundry them before I gift wrapped them!
This is a view of them unfolded to show you how huge they are! Big enough to protect any shoulder from the occasional to not so occasional post feeding spit up. Trust me they were very well tested with my friend's baby and they work awesome. And not just for burp clothes but the random spill cleaner upper or make shift bib even. I'm sure there are tons of uses but that is all I can come up with at the moment...
Sure you could just buy the pack of pre-fold diapers and call them diapies, but without that extra cute fabric touch its just not the same.
I promise its an easy sew.
- Just cut the fabric the same with width and shape as the middle of the pre-fold with an added 1/4" sew allowance around all sides.
- Iron under all the edges.
- Sew a straight or even zig-zag sew all the way around.
This will not be an unwanted gift. Even a first time mother will appreciate the need for a good set of burp clothes. And no one else will have brought any quite like it. Even if you have super crafty friends, the chances of picking the same fabric are almost 0%, really.
But I'm not done yet! I bought an extra pattern of fabric, because it was so darn cute, while getting fabric for the diapies. Then I suddenly realized, "What am I going to do with this?!"
I searched the internet and etsy even pinterest looking for ideas. Then standing in a craft store I remembered seeing a project on Little Miss Momma a while back featuring a fabric memo board. Okay I can do this. Trying to remember what I need from looking at this post about 3 months ago, I bought corkboard and ribbon and found a few cute buttons in my stash. When I actually looked up the post, it was not at all how she made it, so from there is became my own creation.
- I hot glued the fabric onto the corkboard.
- Then I crisscrossed the ribbon also securing with hot glue.
- Then the buttons, yes I also hot glued them.
It doesn't quite work for a plush memory board, but it is a corkboard so tacks will work. (Even though I felt silly saying it, I did warn the mom to be not to put this near the baby's crib, between the buttons and tacks I didn't want to harm her first born.)
Also I used a different color of the same patterned fabric to make her name in plush letters.
- I just chose a font on Word that I liked.
- Printed the letters nice and big and cut them out.
- And used that as a template to trace onto the wrong side of the fabric.
- Finally I sewed and stuffed like any old plushie.
Another cute idea would have been to make the whole alphabet in plush letters but after these three projects I ran out of time till the baby shower.
So I gave you not 1 not 2 but 3 ideas for do it yourself baby shower gifts. I expect you people to get out there and start sewing for your mom and dad to be friends!
Or at least appreciate these cute ideas and smile when you look at the adorable fabrics.
Monday, September 12
Crayon Roll-ups
I have been pretty slack on crafts this past (busy) month. Although I did do one craft that I have been dying to share with everyone.
An adorable crayon roll-up that I found on new blog I found called Sew Much Ado.
I just knew that I had to make it! So I made a few of them. I thought they would make a great gift for a girl or a boy! (I find it hard to make something cute and crafty for little boys.)
Throw it in your "thing to do" bag. Just a few sheets of paper or a coloring book and you have loads of organized entertainment.
What I really want it to make these for my church, where they have goodie bags for kids that attend service. I have all the pieces cut out, now I just need to get motivated to sew them all up.
I was so excited to make these when I saw the instructions. You could modify the measurements to make it a holder for any drawing tools (pencils, pens, or markers). Or even if you want to get grown-up about it, you could use this idea to make a case for your make-up brushes.
I hope it inspires you to whip out the ole sewing machine.
Get crafty!
An adorable crayon roll-up that I found on new blog I found called Sew Much Ado.
I just knew that I had to make it! So I made a few of them. I thought they would make a great gift for a girl or a boy! (I find it hard to make something cute and crafty for little boys.)
Throw it in your "thing to do" bag. Just a few sheets of paper or a coloring book and you have loads of organized entertainment.
What I really want it to make these for my church, where they have goodie bags for kids that attend service. I have all the pieces cut out, now I just need to get motivated to sew them all up.
I was so excited to make these when I saw the instructions. You could modify the measurements to make it a holder for any drawing tools (pencils, pens, or markers). Or even if you want to get grown-up about it, you could use this idea to make a case for your make-up brushes.
I hope it inspires you to whip out the ole sewing machine.
Get crafty!
Monday, July 25
Simple Alterations
Why is the thought of alterations so frightening? Why do people freak out when I say the word hem?
Take a deep breath. Its okay, even you can do a simple alterations. Now I'm not saying get out that $200 blazer you just bought and try to put darts in it. Start small and very basic. Hemming pants is a good way to begin.
For all of my growing years, I watched my mom diligently hem all the pants and jeans I had to the proper length. I think they were mostly tall sizes that were hand me downs from my sister. At least my mom was teaching us economy. Which is so important today.
That is why I even had this first project to work on. I found a great deal on a pair of dark jeans that actually fit my hips and waist. Unfortunately there was only one pair left, a long. I'm only 5'6", these long jeans went clear over my feet. Not even the tallest of heels could hide how ridiculously long these jeans were on me. So I went to work on them (about 3 weeks after I originally bought them).
Take a deep breath. Its okay, even you can do a simple alterations. Now I'm not saying get out that $200 blazer you just bought and try to put darts in it. Start small and very basic. Hemming pants is a good way to begin.
For all of my growing years, I watched my mom diligently hem all the pants and jeans I had to the proper length. I think they were mostly tall sizes that were hand me downs from my sister. At least my mom was teaching us economy. Which is so important today.
That is why I even had this first project to work on. I found a great deal on a pair of dark jeans that actually fit my hips and waist. Unfortunately there was only one pair left, a long. I'm only 5'6", these long jeans went clear over my feet. Not even the tallest of heels could hide how ridiculously long these jeans were on me. So I went to work on them (about 3 weeks after I originally bought them).
I could actually cut off another few millimeters off the bottom. They still seem a little long, but they are not covering my feet up anymore. That was my real goal. I'm counting that as a success.
While chopping off my jeans, I had a brainstorm about this shirt hiding in my closet.
I bought this cute gauzy shirt about a year ago. At the time I thought I could accept the weird 1/2 to 3/4 sleeve length, but the cuff of the sleeve cut into my arm. Honestly it was hard to get the shirt off over my head. So what I'm trying to say is I never wanted to wear it, before...
Before I hacked off those wonky sleeves. I sewed up the edges with a simple straight stitch. (I honestly wasn't even that careful about the straight part.)
It looks much better, its more comfortable and its so much easier to put it on. Now I think this shirt will become a summer staple in my wardrobe.
Okay so this was no "how to" guide on these alterations. More of a suggestive nudge. This is a simpler take on the Re-dress Idea. We might not all have the skills the Bishie has, but we can still do simple things recreate a piece of clothing. Even if its switching a retro button to a more modern one. It can really transform an outfit.
Dust off that sewing machine, if you don't have one borrow one from a friend or your mom. Begin your adventure in creativity.
Saturday, June 25
Easy Tote
The last prize is finally complete. Hooray! Hopefully the next time I do a giveaway it won't take me so long to get all the prizes done.
The third and final prize winner is my bestest friend in the whole world's mother, Noel. She assured me that I didn't really have to make her anything. But I assured her I was going to, so if she had a suggestion she better give it to me. She gave me the idea for a tote bag.
Okay so I've made a few tote bags now. I needed a new challenge with the tote. So I decided this tote was going to be the easiest tote ever to make! Not that I didn't want to spend loads of time on Noel's prize. But I just decided randomly that this was going to be how I made this tote special.
Now how could I use what I have learned by making other totes to make one super quick and easy?
Tips
1. No lining
2. Body piece of fabric is one big panel
3. Straps have no interfacing
4. Top is turned under and sewed shut
5. Sides are sewed straight up
6. Patterned fabric hides the stitches that show on the right side of the fabric
7. No fancy pockets or closures
I love this idea for someone a quickie present. You could even use this as a gift bag and fill it with other exciting things.
Or I love this idea if you find a fabric you think is cute and a good deal at your local fabric store, look at their remenant bin or the sale fabrics. Depending on how big you want the tote, you only need around 1/2 yard of fabric.
Of course you can take all of the shortcuts and put them back into the construction and make something more complicated. But I can't promise its going to be more awesome! I just love how this bag turned out. I know Noel will appreciate the quick, easy and thriftiness of this bag!
The third and final prize winner is my bestest friend in the whole world's mother, Noel. She assured me that I didn't really have to make her anything. But I assured her I was going to, so if she had a suggestion she better give it to me. She gave me the idea for a tote bag.
Okay so I've made a few tote bags now. I needed a new challenge with the tote. So I decided this tote was going to be the easiest tote ever to make! Not that I didn't want to spend loads of time on Noel's prize. But I just decided randomly that this was going to be how I made this tote special.
Now how could I use what I have learned by making other totes to make one super quick and easy?
Wha-cha! Easy tote. Big enough to hold a few books or stack of papers. You can also fold it up small in your purse and whip it out to save a plastic bag at any store. I will gladly share with you some of the tricks I used to make this easy.
Tips
1. No lining
2. Body piece of fabric is one big panel
3. Straps have no interfacing
4. Top is turned under and sewed shut
5. Sides are sewed straight up
6. Patterned fabric hides the stitches that show on the right side of the fabric
7. No fancy pockets or closures
I love this idea for someone a quickie present. You could even use this as a gift bag and fill it with other exciting things.
Or I love this idea if you find a fabric you think is cute and a good deal at your local fabric store, look at their remenant bin or the sale fabrics. Depending on how big you want the tote, you only need around 1/2 yard of fabric.
Of course you can take all of the shortcuts and put them back into the construction and make something more complicated. But I can't promise its going to be more awesome! I just love how this bag turned out. I know Noel will appreciate the quick, easy and thriftiness of this bag!
Friday, June 24
Kid sized owl purse
Giveaway prize # 2 is complete. It will soon make its long journey to South Korea. Why you ask is it going halfway around the world? Well let me tell you...
The winner of this prize was Marshall (A Day in the Life). He is a proud solider in the USAF. He, his wife, Mary (Windshields and Rear-view Mirrors), and their two kids, Maddox and Maverick are stationed in South Korea. They have been over there for what seems like forever but its really only been since November 2010. They have been able to learn and live in a whole different culture. I envy their courage to travel and explore a foreign land.
When Marshall won the giveaway I was more than excited to make something for him. When I asked what kind of handcrafted do-da he wanted me to make him, his request was an owl purse for his daughter. I was secretly hoping to make her a cute gift. I mean what crafter doesn't want to make a cutesy present for an almost 4 year old girl? Although just for Marshall's information I did actually have some clever more manly ideas that Paul helped me come up with.
The journey to the owl purse was slightly epic, because my brand new sewing machine started malfunctioning after every other stitch. I spent most of last week throwing different objects around the apartment in utter frustration. I broke 2 needles in a matter of minutes. It was not a good time. I was very disappointed. I wanted to get this in the mail last week.
Thank goodness I was able to easily exchange the machine at the big box store I got it from. The new new sewing machine has, so far, been nothing but a dream machine. I was able to quickly finish sewing up the pieces I had already cut out. I sewed the face on halfway through. And BAM!
A child sized owl purse. I only wish I had someone's kid here to model it for me. I meant to take a picture that showed some scale, but maybe if I ask really nice I can get a picture of Maddox modeling it for me.
There is just enough room inside for a few little girly knick-knacks, which I'm assuming most little girls have the need to carry around with them.
I wish I could say something sweet like, 'I hope she likes this as much as I liked making it'... but I almost had to kill someone from frustration while making this because of my broken machine. So instead I'll say I hope she loves it, because I think its reaallly cute.
The winner of this prize was Marshall (A Day in the Life). He is a proud solider in the USAF. He, his wife, Mary (Windshields and Rear-view Mirrors), and their two kids, Maddox and Maverick are stationed in South Korea. They have been over there for what seems like forever but its really only been since November 2010. They have been able to learn and live in a whole different culture. I envy their courage to travel and explore a foreign land.
When Marshall won the giveaway I was more than excited to make something for him. When I asked what kind of handcrafted do-da he wanted me to make him, his request was an owl purse for his daughter. I was secretly hoping to make her a cute gift. I mean what crafter doesn't want to make a cutesy present for an almost 4 year old girl? Although just for Marshall's information I did actually have some clever more manly ideas that Paul helped me come up with.
The journey to the owl purse was slightly epic, because my brand new sewing machine started malfunctioning after every other stitch. I spent most of last week throwing different objects around the apartment in utter frustration. I broke 2 needles in a matter of minutes. It was not a good time. I was very disappointed. I wanted to get this in the mail last week.
Thank goodness I was able to easily exchange the machine at the big box store I got it from. The new new sewing machine has, so far, been nothing but a dream machine. I was able to quickly finish sewing up the pieces I had already cut out. I sewed the face on halfway through. And BAM!
A child sized owl purse. I only wish I had someone's kid here to model it for me. I meant to take a picture that showed some scale, but maybe if I ask really nice I can get a picture of Maddox modeling it for me.
There is just enough room inside for a few little girly knick-knacks, which I'm assuming most little girls have the need to carry around with them.
I wish I could say something sweet like, 'I hope she likes this as much as I liked making it'... but I almost had to kill someone from frustration while making this because of my broken machine. So instead I'll say I hope she loves it, because I think its reaallly cute.
![]() |
| Maddox with her purse |
Tuesday, May 17
Penguin Tablet Case
I made this case for my friend, Short Stack. She had been coveting a case on Etsy. I promised to give it a shot. After the acquisition of my first sewing machine I was finally able to come through on that promise.
So here is my attempt...
I actually tried to keep up with the way I constructed this case. So I can actually share some instructions. My disclaimer is I don't know all the technical sewing terms. If you have any questions on the how to let me know.
1. measure fabric and draw body shape
- black fabric for body, lining for body, white for belly and belly lining
- beak and eyes from felt
-interfacing for belly and body
2. cut fabric
3. iron on interfacing to lining fabric
- belly and body
4. sew lining to outer body, right sides together
5. sew on felt eyes
6. sew the top of belly lining and fabric together, right sides together
7. turn body
8. press all seams
9. sew belly to body
10. sew on snap on underside of beak area
11. iron on applique to the back
12. sew up sides
13. sew on pupils
14. sew snap on belly
- black fabric for body, lining for body, white for belly and belly lining
- beak and eyes from felt
-interfacing for belly and body
2. cut fabric
3. iron on interfacing to lining fabric
- belly and body
4. sew lining to outer body, right sides together
5. sew on felt eyes
6. sew the top of belly lining and fabric together, right sides together
7. turn body
8. press all seams
9. sew belly to body
10. sew on snap on underside of beak area
11. iron on applique to the back
12. sew up sides
13. sew on pupils
14. sew snap on belly
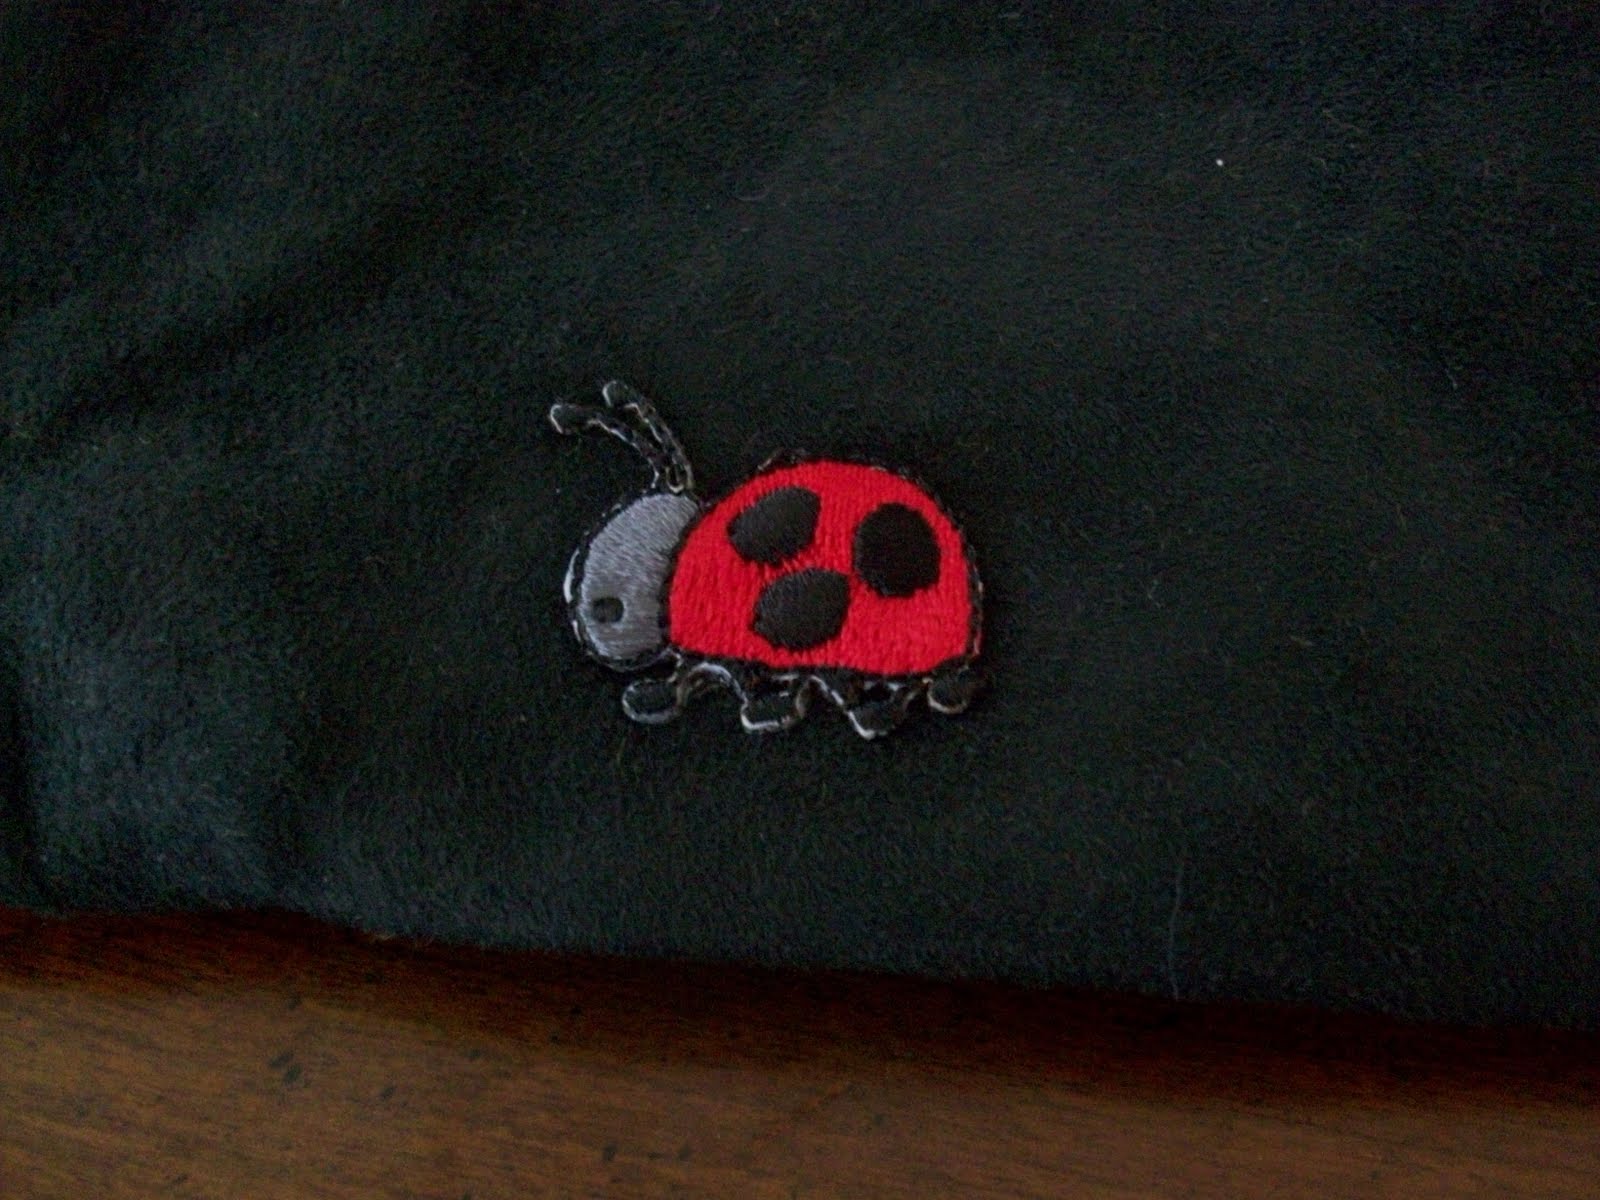
Having a good understanding of what the customer wants is important. She liked bright colors for the lining; greens, pinks and oranges. Also I know that she loves ladybugs, so I found a cute iron on applique for the back. (A kind of a made up tag)
Now I just have to get it to her and see how her tablet fits in there. I made it bigger than the dimensions she gave me, mostly to make sure I left room for error. But she could also put in a small notebook or her cellphone too. Hopefully she will like it. And I can be satisfied with a job completed!
Its fun to make something for someone else. Also I love the feeling of accomplishing something.
On a side note: Thank you to my Grandparents for funding the purchase of my new sewing machine.
Tuesday, April 26
Re-Dress
This is a post inspired by my wonderfully talented friend Bish. (Like her as CosplayRandom on Facebook)
She was actually inspired by another blogger that took on the mission of having a New Dress A Day for a year.
Bish happens to have some mad sewing skills and was able to produce a few amazing re-dresses that blew my mind. This is meant to show you that not everything is as it seems. It takes some time and skill but you could take an oldie in your closet, like this first one she did, and turn it into something new.
This dress had a few not so attractive stains on the front. I would probably have trashed it or given it to Goodwill. But not Bish. She snipped a few places. And Ta-da!
An adorable new top, just like that. That is the smile of a girl that knows she just saved a few dollars.
The next one shows us that too big does not mean all wrong.
Yeah most people would have looked at the size sticker and walked off. But Bish was intrigued by the print and neckline of this dress and just knew there was more to it.
Wowie! She sure knows her seams. Take it in, take it up and use the extra fabric to create a cinch belt. Just amazing. A sundress bought for mere change at Goodwill and transformed with a genius hand.
But that's not all.
This last dress took a few extra steps to bring it to life.
The purple dye job was first. Ya gotta go with your favorite color. Then she added some lace trim and shortened the hemline. Cute, summer-y and only a few dollars from a thrift store.
So for those of you out there that have those amazing sewing skills like Bish or Marisa. Don't just play around with patterns and new fabric. Save some time and money and go to your local Goodwill or Thrift store and see if anything inspires you.
She was actually inspired by another blogger that took on the mission of having a New Dress A Day for a year.
Bish happens to have some mad sewing skills and was able to produce a few amazing re-dresses that blew my mind. This is meant to show you that not everything is as it seems. It takes some time and skill but you could take an oldie in your closet, like this first one she did, and turn it into something new.
This dress had a few not so attractive stains on the front. I would probably have trashed it or given it to Goodwill. But not Bish. She snipped a few places. And Ta-da!
An adorable new top, just like that. That is the smile of a girl that knows she just saved a few dollars.
The next one shows us that too big does not mean all wrong.
Yeah most people would have looked at the size sticker and walked off. But Bish was intrigued by the print and neckline of this dress and just knew there was more to it.
Wowie! She sure knows her seams. Take it in, take it up and use the extra fabric to create a cinch belt. Just amazing. A sundress bought for mere change at Goodwill and transformed with a genius hand.
But that's not all.
This last dress took a few extra steps to bring it to life.
The purple dye job was first. Ya gotta go with your favorite color. Then she added some lace trim and shortened the hemline. Cute, summer-y and only a few dollars from a thrift store.
So for those of you out there that have those amazing sewing skills like Bish or Marisa. Don't just play around with patterns and new fabric. Save some time and money and go to your local Goodwill or Thrift store and see if anything inspires you.
Friday, April 15
Animal totes/purses
This idea came from a forum post I found while searching for sewing crafts related to owls. Yes I know my obsession with owls continue. What can I say they are cute. I found a post on craftster.org http://www.craftster.org/forum/index.php?topic=366907. I thought it was clever to use an old men's wool jacket for such a cute craft.
Okay so I don't own any old men's suit coats. So instead I scrounged the fabric scrap bins at my local fabric store for a suitable (pardon the pun) fabric. I found a decorator fabric that had a similar style to the menswear. With some felt, embroidery thread, cotton lining fabric and cute buttons I was off on an adventure to figure out my own pattern for this cute creation.
This is what I came up with...
I would love to give you step by step instruction on how I made this, but its mostly a blur now. It was very time intensive and took a lot of motivation to complete. Motivation I typically do not have.
After posting a picture of this purse on my facebook I immediately had requests from family and friends to make them versions of their favorite sea creatures.
So I undertook two more purse and tote projects. I was nervous. As I have said before just because I have these ideas for projects, it does not mean that I will have the motivation to complete them. Somehow the thoughts of disappointing my sister and good friend was enough of a catalyst to create them their requests.
First was the Octopurse for my sister.
She is studying biology at UC Berkeley. She mostly studies crabs, but she has a soft spot (kind of punny) for octopi. She studied under a professor at UNC Chapel Hill that did biomechanic studies on octopus tentacles. Well and the fact that octopi are just really cool creatures and extremely intelligent.
Sorry random tangent... I made this purse similar to the owl purse. It has two interior pockets and velcro to secure the top. I used embroidery thread to shape out the tentacles. And yes there are eight. Button eyes and a sweet thread smile finish him off.
It was another time intensive project. The legs took forever. But it was definitely worth it. Anything for my big sis.
The last one I have made is for my Asheville buddy.
She also have a random soft spot for jellyfishes. I know she doesn't carry any purse but the one that she currently owns. So I thought of making a tote instead of a purse. Part of this decision was selfish, because I thought a tote would be easier to produce.
So the jellytote was born. I turned out pretty cute. And it did end up being much easier to make then the purses. Much simpler design. No cute button eyes. Although I had to incorporate purple since its her favorite color. I like using information like that to make the creation even more special for the person I am making it for.
I suppose I could have cut up this post into three different posts. But since they were all created from the same basic idea. I thought this was more appropriate.
If you would like more instruction for these bags just let me know. I might be able to explain it better one on one.
This is a good idea for a rainy weekend. Or if you need a gift for a special friend that seems to have everything. Create your own! They won't have anything like it already!
Okay so I don't own any old men's suit coats. So instead I scrounged the fabric scrap bins at my local fabric store for a suitable (pardon the pun) fabric. I found a decorator fabric that had a similar style to the menswear. With some felt, embroidery thread, cotton lining fabric and cute buttons I was off on an adventure to figure out my own pattern for this cute creation.
This is what I came up with...
I would love to give you step by step instruction on how I made this, but its mostly a blur now. It was very time intensive and took a lot of motivation to complete. Motivation I typically do not have.
After posting a picture of this purse on my facebook I immediately had requests from family and friends to make them versions of their favorite sea creatures.
So I undertook two more purse and tote projects. I was nervous. As I have said before just because I have these ideas for projects, it does not mean that I will have the motivation to complete them. Somehow the thoughts of disappointing my sister and good friend was enough of a catalyst to create them their requests.
First was the Octopurse for my sister.
She is studying biology at UC Berkeley. She mostly studies crabs, but she has a soft spot (kind of punny) for octopi. She studied under a professor at UNC Chapel Hill that did biomechanic studies on octopus tentacles. Well and the fact that octopi are just really cool creatures and extremely intelligent.
Sorry random tangent... I made this purse similar to the owl purse. It has two interior pockets and velcro to secure the top. I used embroidery thread to shape out the tentacles. And yes there are eight. Button eyes and a sweet thread smile finish him off.
It was another time intensive project. The legs took forever. But it was definitely worth it. Anything for my big sis.
The last one I have made is for my Asheville buddy.
She also have a random soft spot for jellyfishes. I know she doesn't carry any purse but the one that she currently owns. So I thought of making a tote instead of a purse. Part of this decision was selfish, because I thought a tote would be easier to produce.
So the jellytote was born. I turned out pretty cute. And it did end up being much easier to make then the purses. Much simpler design. No cute button eyes. Although I had to incorporate purple since its her favorite color. I like using information like that to make the creation even more special for the person I am making it for.
I suppose I could have cut up this post into three different posts. But since they were all created from the same basic idea. I thought this was more appropriate.
If you would like more instruction for these bags just let me know. I might be able to explain it better one on one.
This is a good idea for a rainy weekend. Or if you need a gift for a special friend that seems to have everything. Create your own! They won't have anything like it already!
Owl Coin Purse
This is one from an Etsy store by keykalou.
I won't be able to give directions for this one. But if you want to visit her etsy site the pattern is only $5.00.
http://www.etsy.com/shop/keykalou
The idea for this project came from a friend on facebook. She noticed this pattern on etsy and sent me the link. She knows how obsessed I am with owls and once I saw the product I knew I had to give a shot. Normally I wouldn't take on a sewing project with more than two steps. But what the heck its too cute not to attempt. So I made two so far.
It could be cute gift for a friend. A fun way to give a gift card. A place to keep some mad money. Or any little trinkets. It could even be a chance to make a few extra dollars on etsy.com.
Give it a try. It's not that hard and doesn't take a long time to make. My favorite kind of crafts.
I won't be able to give directions for this one. But if you want to visit her etsy site the pattern is only $5.00.
http://www.etsy.com/shop/keykalou
The idea for this project came from a friend on facebook. She noticed this pattern on etsy and sent me the link. She knows how obsessed I am with owls and once I saw the product I knew I had to give a shot. Normally I wouldn't take on a sewing project with more than two steps. But what the heck its too cute not to attempt. So I made two so far.
It turned out pretty well. No where near perfect, but it was cute and it made me smile. What could be better?
It only required a few pieces of scrap fabric, velcro, button eyes, and some interfacing. I bought the fabric from the scraps bin at my local fabric store at 80% off their normal value per yard. All in all it didn't cost much more than the change that would fit inside it.
It could be cute gift for a friend. A fun way to give a gift card. A place to keep some mad money. Or any little trinkets. It could even be a chance to make a few extra dollars on etsy.com.
Give it a try. It's not that hard and doesn't take a long time to make. My favorite kind of crafts.
Subscribe to:
Posts (Atom)


