Wednesday, February 17

The Big Announcement

When it came to being pregnant I was thrilled. I was terrified. I felt unready. I felt... Basically every emotion you can feel all at once.
But one thing was for sure it was going to make it a big deal!
I tend to be a person that lives in the background. Watching the world turn around me. Enjoying my own achievements and successes mostly among my close friends and family. 
I didn't have a big graduation bash or a bachelorette party.
And that was fine by me. Being the center of attention has always made me quite uncomfortable.

For whatever reason I decided that this moment in my life was going to memorable in a fun way.

Now how was I going to make that happen?

With some awesome pregnancy announcements of course! 
Now I had to go to Pinterest and a good friend for help with these announcements. I knew that I wanted them to be special.

First group of people that got the big news was parents (new grandparents) and my sister and brother in law.
I knew right away how I wanted to make this announcement. A gift.


On what was suppose to be a routine visit to my parents house in March of last year I brought with us two simply wrapped presents. I knew the not wrap them in paper because my dad takes much longer to open presents than my mom. And they obviously needed to be opened at the same time.
I, of course, was overly excited to give them the presents but was trying as hard as I could to mask it. Otherwise they might be onto me. I mentioned that it was the same thing so they should open them at the same time. We had got in late that night and they were pretty much ready to call it a day. But there was no way I was going to sleep one more night without them knowing. My mom slowly opened her box, seeing my dad taking his time with the ribbon. I positioned myself on an adjacent sofa trying to be patient. Finally they pulled out the onesies. Cue the tears and hugs.

This was a simple project. 
I bought a 6 pack of white 0-3 month onesies from Carter's. I picked out some cute iron on appliques from the fabric store and grabbed some fabric markers. The hardest part was coming up with the cute things to write. (I did have to go back and sew on the appliques after I washed them. Probably should have just done that initially or done a more solid job ironing them on.)

I love owls so I knew I had to come up with a cute owl for my mom. She also used this picture to make the announcement to her fifth grade class.

Whose going to be a Granny?
My dad had two daughters but that didn't stop him from taking us fishing, gem mining, camping and hiking. Those were some amazing memories that I look forward to him sharing with my children. So naturally I chose a fish from my dad.

New Fishing buddy Coming in October
My sister is a research scientist and did a research study on crabs. So I had to do a crab for her announcement onesie. Reading "Getting ready to Sea my Aunt". My husband came up with that one. 
My husband's parents got the cute pea pod. Saying on that one was "New Sweet Pea Arriving October".

My mom was so excited she had to tell my sister right away. She wanted to Skype with her so she could see her onesie. That took forever to set up on our end. By the time we got her on the phone is was pretty late at night and she had basically figured out what was going on. Ha.
Couldn't work for everyone.

My in-laws got their onesies a weekend later. We hadn't seen them since Christmas so were hid the onesie among some Christmas presents.

We decided to wait until the end of the first trimester to tell everyone else. That's when the rest of the fun began. 
I found the idea for my co-workers via Pinterest. I taped this flyer inside a box of doughnuts. Then encouraged everyone to enjoy a free doughnut. The reactions were great. I've never been hugged so much at work. Which I suppose is probably appropriate. 

Enjoy some doughnuts! I don't want to be the only one with a growing belly.

My favorite announcement was definitely the one that a friend helped me create for the Facebook masses. This one was the easiest to decide on. I knew I wanted my friend to make cookies that told a special story. I have a friend that makes the most beautiful cookies and I knew that she could make the perfect announcement cookies.

I gave her a simple sketch of what I wanted and she created the magic. I was lucky to have a friend that would gift me these amazing cookies but keep in mind if you want to buy these from an artisan that they will cost a decent amount of money. These took my friend a lot of time and effort and talent and I am very appreciative of the skill that she shared with me to make my announcement so special.

Love... Marriage... Baby Carriage October 24 2015
I know that little plus signs would have made sense too but I lots of friends that are not going to have children. I didn't think it was right to imply that Love + Marriage = Baby. I know I'm weird. Works out fine because I love how the ellipse turned out. 
And even though we are typically not particularly photogenic people I wanted to take some cute pictures with the wonderful cookies that my friend made us.

Trying to be cute about it

Encouraging him to eat it

But he doesn't want to ruin the cookie

Just for fun
We had a lot of fun posting these pictures to all of social media. It has been fascinating to see the sudden interest in my life. Babies will definitely do that.

All in all we had a great time making this big announcement to all the different people in our lives. Big announcements might not be your thing or my ideas might not be big enough! But I just wanted to take some time to tell you about what we did.

Pinterest is a great place to look for ideas as always. Go ahead make a secret board. Maybe one only you can see or one for you and a friend or spouse. My husband did help with planning parts of the surprises and I really appreciated it.

And don't forget to have fun with it!
Feel free to share your announcement ideas in the comments.

Friday, February 5

Not that easy

Way back when my husband and I were just dating we talked about having kids. Obviously not at that moment but in the future. It's important to know you are both on the same page even in the beginning. Or that's what I believe.
He's two years younger than me. Yes I've heard all the robbing the cradle jokes.
I met him my junior year of college and when he was just starting his freshman year. I love our meet cute. We met through a friend. She invited me to come to lunch with her to be a buffer while she had lunch with this guy. She met him over the summer at a day camp they worked at together. She thought he had a crush on her. Which he kind of did. But mostly he just wanted to connect with some people that he knew. I went in curious to see who this fellow was that she had mentioned to me several times over the summer. My first impression was he was a nice guy and very funny. We joked around the whole lunch. Suddenly I realized this was someone I wanted to get to know whether she did or not. A romance bloomed from there. First for him and eventually for me. I kept telling him to enjoy his freshman year. That he sagaint get tied down to a girlfriend so early on. But he didn't care about that. Over fall break in October he went home for the long weekend. While he was there he went to Build a Bear and made me a teddy bear that was dressed like him. Hawaiian shirt and cargo shorts. I never made a Build a Bear. So when he described to me the silly hoops he had to jump through to make it I was in awe. No guy had ever gone to that much trouble for me. Certainly not someone I wasn't even dating. He had my heart then...

Our first date
But it wasn't always easy for us. Anyone that has been in love knows you have to work at it.
Since I graduated two years before him, we had to endure a long distance relationship. It was definitely a hard time for both of us. But neither of us were willing to give up.
Eventually we made it to the other side. Then we went to moving in together to being married in a matter of months. 

First kiss as a married couple

Then the waiting began again. Even though I don't like change as I have previously stated. I am always focused on the future. To a fault. Sometimes I miss out on the present because I can't wait for the next adventure to begin. 
That's exactly how it was when it came to becoming a mother. As soon as we were married I was ready to try.
The more practical half of myself (my husband) wanted to wait. The biggest thing that he wanted to make him feel ready was owning our own home. 
Well that took about four years of marriage and moving three times to three different states to make that happen. So of course the month we moved in I brought up the subject once more. He brought out his practical nature again and encouraged me to be patient until we were a little more settled. 

Our first home
By our anniversary I was chomping at the bit to get started. I had a feeling it wouldn't be so easy to just "get pregnant". This time I was right...
There is no other way to describe the next two years other than a struggle. I won't go into too many details because though I'm an open book my husband is actually quite a private man. 
We tried and tried. 
Every month that I would be late a day or two my heart would be in my throat the whole time. Until my period would show up or that dreaded minus sign would appear on the test. 
Anyone that has dealt with infertility knows how heart breaking this is. Its not like your period isn't bad enough but when you're trying to get pregnant is a double whammy. 
A lot of months I dealt with disappointment on my own. I didn't want to get my husband's hopes up for no reason. But I couldn't help it getting my hopes up. I knew I was days late. I knew that could mean the greatest joy. I also knew my husband's hesitation to get the process started. I suppose that I was nervous he might actually be relived when the test showed negative. That would be even more heart wrenching. 
So after a few months of disappointment I finally told him that I was very depressed that yet again I wasn't pregnant. He looked at me and very sincerely said "Damn that sucks. I thought it would have happened by now." Suddenly I wasn't alone in my sadness. 
Eventually even his support wasn't enough. I confided in several friends that we were struggling. Because of my husband's private nature it was a taboo subject with our families. 
I went in for my gynecology appointment in the spring and completely unloaded all my fears and frustrations on the nurse practitioner. I was definitely "that patient" that put them behind that day...
She completely understood and had gone through her own fertility issues. She recommended an fertility specialist and said at the end of our conversation, "Don't worry one way or another we will make you a mother."
It was a disappointing to think we wouldn't be able to do this natural thing on our own... But good to be reminded that it didn't matter how it happened the end result was the important part.
My husband and I went through several fertility tests.
Mine were quite invasive. Especially compared to his... Think that episode of Friends with Monica and Chandler get their fertility tests done. If you haven't seen it YouTube it seriously.
The results were basically that there weren't any major issues that we could keep trying to do start medical intervention...
IUI, InVitro, Adoption... So much money, so much stress.
We waited months. Continuing to try on our own. 
Armed with the knowledge that I wasn't horribly disfigured on the inside. I did relax a bit.
Although over Christmas I finally told my husband that I needed my mommy. Well I needed to be able to talk to her about my struggles. I wanted her advice, her kind words and her support. He agreed and understood. I very awkwardly broke down while I was at their house and unloaded on her too. That helped too. 
Once we entered into 2015 I told my husband this was the last year of trying. We were going to make something happen!
My grandmother passed away in January and by Fat Tuesday my Cajun relatives were really on my mind. So I decided to host my ladies church group at my house for our once a month Tuesday night meeting which just happened to be on Fat Tuesday in 2015. I was really looking forward to cooking some gumbo and drinking hurricanes, decorating with Mardi Gras beads and other knick knacks my granny had sent my mom.

Beads are important

It was no big deal at this point to be a few days late on my period. Almost two and half years in I almost didn't notice anymore. I did mention to a girlfriend before the weekend that I was late. She got so excited. But I wasn't. I couldn't stand seeing that negative line on that stupid stick. It mocked me... So I put off the test. By Tuesday morning I shrugged and peed on the stick. Hey if I was going to down some drinks that night I should probably make sure I was actually not pregnant. Although I had already went to town on some mimosas that weekend for Valentine's Day... 
I impatiently waited the two minutes going about my morning routine. Eventually I checked it and stare blankly. A plus? Wait one of the lines is kind of faint and the other is dark. That's probably wrong right? I checked the box. The dark line is the one that indicates the positive side. I was confused... I almost didn't realize what this test that had elicited such feelings of failure was trying to tell me.

Yeah I took a picture
I blankly walked out to the living room carrying the stick and held it out to my husband and said "I didn't think it was going to say this..." He kind of furrowed his brow and raised an eyebrow. "Well what does it say?" "It says I'm pregnant!?" He just sat there. "Well can I get a hug at least?" He jumped up and hugged me. We said our goodbyes to head to work. I worked half a day so that I could prepare for my get together. 
My mind was NOT on the party that I was so looking forward to. I hope my friends had fun because I felt like a blank slate that night.
Its an interesting story to tell now. But during the journey it was hard and stressful to say the least. Every questioning person asking "when are you going to have kids?" Snide remark like "don't wait too long." All had their effect. 
If nothing else it has made me a more compassionate and understanding person. You just don't know what someone else is going through. 
This post is mostly another set up. Setting you up to understand who I am and where I'm coming from. I hope it was interesting in some way. If you are struggling with fertility issues remember that you are not alone. Many people struggle in silence. What I have learned is to find people to lean on. You don't need to announce it on Facebook. But find a few close friends or family members. You would be surprised who has been down this road. 
Also don't wait till you are at a breaking point to get help from a medical professional. Even if they don't have a definite cause for your infertility you can rule out some possible stresses and get advice.
Good luck to everyone on the journey to become parents.

A New Beginning

Welcome back to the world of blogging to myself.
I have thought a lot of blogging lately. By that I have been reading a lot of blogs lately. Mommy blogs, parenting, pregnancy, breastfeeding, cloth diapering. You name it I've Pinterested or Googled it. I have pins for how to make your own baby food, how to wash a cloth diaper, what to eat and not eat when you're pregnant, and even what to put in your hospital bag for labor.
I am a planner, not quite Type A. But I definitely like to have things ready to go. I don't handle change well and usually the preparation helps me deal with it better.
Becoming a parent is basically the biggest change in your entire life!
I mean getting married was a change but not that much. One day you are totally in love and together and then you are married and you are still totally in love and together. Not much change. Especially when you are already living together like we were. Although we did get some pretty cool gifts for our wedding. But for the most part our lives remained virtually the same. 
Becoming a parent though... That changes everything! I don't mean you don't get to go out to eat whenever you want and get less sleep. I mean it changes your whole core existence. It changes who you are. If you think that sounds scary or you are worried you aren't ready for that. You will be. Sometime during a middle of the night feeding or laying in a bath of Epsom salts it will hit you that your whole mindset has changed. 
Like I said earlier I am not into change. Even with all the research and preparations that I made, it was still and continues to be a concept of great contemplation. 
I say all this to introduce a new idea for this blog. Well not that new and not that inventive. But I am going to make my blog into a supportive, experience, and place for ideas. 
I am by no means a perfect mom. But I have tried and learned some things that I think would be good to pass along. I've already been through some struggles and had successes. Whether anyone reads this or not I still want to be able to document my journey through motherhood.
Beware this is going to get real and personal. I didn't have a very good "filter" before and its basically gone now. Ha!
I'm not even sure where to begin. Maybe at the beginning?...


I hope ya'll enjoy.

Friday, March 14

Apple Danish Ring

From time to time we have company visit us and I feel inspired to make a special breakfast/brunch type meal. My in-laws were in town a few weeks ago and I knew that I wanted to find a really special treat to add to my brunch menus. While browsing Pinterest the week before they came and saw a recipe for a delicious Apple Cream Cheese Danish. I couldn't wait to try out this recipe on my in-laws. I had a feeling this would be right up their alley.


INGREDIENTS

  • 2 (8-oz) packages crescent rolls
  • 1 (8-oz) package light cream cheese, softened
  • 1 can apple pie filling
  • ¼ cup powdered sugar
  • 1 egg yolk
  • ½ tsp. vanilla extract
  • ½ cup powdered sugar
  • 2-3 tsp. milk
INSTRUCTIONS
  1. Preheat oven to 350ยบ. Spray a pizza pan with cooking spray. Open both packages of crescent rolls and separate into 16 triangles. Arrange 12 triangles in a circle on the pizza pan, with wide edges on the outside of the pan and the points of the crescent triangles in the middle. Press the outer seams together, leaving the points in the middle alone.
  2. Make cream cheese filling: In a bowl, combine cream cheese, ¼ cup powdered sugar, egg yolk, and vanilla extract. Whisk until smooth. Spread cream cheese mixture evenly over the outer edges (about 2″ wide) of the dough, within about ½” of the edge. Spoon pie filling on top of the cream cheese layer.
  3. Now take the points of the crescent triangles in the middle of the pizza pan and place them up over the filling, pressing the point into the outer edge. Make your way around the pan doing this, making a circle shape.
  4. Cut the remaining 4 crescent triangles lengthwise into three strips. You will have 12 small triangle shaped pieces. Going around your circle, place the outer edges of the small triangles into the uncovered filling areas. There should be 12 “empty” spots to place your small triangles. Press the larger seams together on the outside of the ring and the points on the inside of the ring.
  5. Bake for 25-30 minutes, or until golden brown. Remove from oven and cool for about 10-15 minutes.
  6. Make glaze: combine ½ cup powdered sugar and 2-3 tsp. milk and mix until smooth. Drizzle evenly over pastry. Slice into triangles and serve.


I added this to the a buffet of fruit and some link sausages which I know is a family breakfast tradition. Voila! I sliced the apple ring into yummy wedges and they were devoured.

I have information from my mother in law that my father in law liked it so much that he requested for her to make it at their home. She even tried it with cherry pie filling, which is his favorite fruit. It was also a hit.

I loved this recipe because it was easy and quick. Two things I think that are really important when making brunch. You don't want to wait forever for the host to be cooking and baking forever! By brunch everyone is trying to politely act like its okay whenever the food is ready. But in reality everyone is starving!

I also enjoyed making this because it required just a few common and easy to obtain ingredients. And as my mother in law did you can easily make it your own and mix up the fillings.

So why not try this out on your next family get together or add mimosas and get a few friends together on a Sunday morning.

Simple Sew Napkins


I know this post seems really out of timeline. But I was browsing around in my pictures and forgot that I had made a photo journal of this project so I wanted share. I am always looking for quick easy projects to do on a quiet afternoon and this one really fit the bill. A while back I found a really cute patterned remnant with some adorable turkeys on it at my local Hancock Fabrics.
I decided the best use for the small piece of fabric would be to make some napkins for my next Thanksgiving feast. But how!?

This simple project starts off by equally cutting down the fabric by folding it over and over until I had a reasonable napkin sized square.


 Then I picked two pieces and put them "wrong side" together.


I did a quick running stitch on my sewing machine on 3 of the 4 sides.
I didn't even have to pin down the edges which was nice because I made 8 napkins.


I turned the fabric outside in and ironed the sides smooth. The last step is just as easy...


A running stitch around the whole edge and you're done!
Be sure to wash before you use them. You don't even want to know how many chemicals are sprayed on fabrics that come into the country. Ugh.

I made mine on the small side. In hindsight I could probably have made them longer/wider. But that's how you learn is by trying and... failing. (Not that I would call this a particularly big error.)

So the next time you see a cutie remnant or you trying to decide how to make your table-scape a bit more festival don't forget even you can sew up a few napkins to add to your collection.

Wednesday, January 16

Christmas Tree Skirt

I always have all these ideas for Christmas-y fun, decor and foods. This year would be the first year in our new home. I knew that I needed to do something special.

I remembered my old tattered, felt tree skirt that I had bought for a few dollars years before in my first apartment after college. It DID have a laser cut edge that was cut to look like poinsettias.

I say did because I don't think it made it through one Christmas before my cat had chewed and clawed the decorative edge to bits.

Rolling my eyes I knew that I should not do anything too fancy, expensive, or intricate because it most likely would not survive the wrath of my beast. So I decided to keep it simple, which was more my style any ways.

I sought out the help of pinterest. I knew that I would be able to find loads of ideas. And boy did I. Too many. I had narrowed it down and finally for final decision I deferred to my husband. I wanted it to be special for him too. He chose this tree skirt.

At first I was not sure how to proceed since it was only a picture with no tutorial. I got some advice from for mentioned patient friend and read other tutorials with similar results.

This project was going to take a lot of felt and a lot of hot glue.


I first cut off the destroyed edge of my old tree skirt. No need for the good part to go to waste.


Then I used half of the top of a Christmas ribbon spool to fashion a scalloped edge template. Clever I know... some of the most clever ideas come from being super thrifty.

Then I cut... a lot. I decided on layering 4 colors to give the skirt some extra width. I got a 1/4 of a yard of red, white, light green and dark green. I actually only used a 1/8 of a yard but I found a good home for the remaining fabric.


Once I got done cutting it was time for all that hot gluing. I did not do a lot of pinning things. I just started gluing and layering the rings. It made it a little uneven at the backside. But you do not normally see that side and it saved me a lot of time and aggravation.


Then POW done.

It was actually a pretty easy project. I was very happy with how it turned out. Festive but not over the top. Definitely gave good dimension to our first Christmas tree in our new house. And it was almost big enough of all of our presents. Almost...

I hope everyone had a lovely holiday season. I know I did.

Upholstered Trunk

Waaay back in the summer even before we moved into our new house (back when it was still new), my mother in law gifted me a project that she had all but given up on. Sad to see such a project go by the way side I adopted it.

We brought it to our new home and it sat forlornly in my garage for a few more months before I got up the courage to start on the project myself.

I had so many ideas but I was nervous about getting started. Finally I decided one week that it was going to be my mission to get this project completed!

I had already decided where it was going in my house. (It's kind of an unspoken rule in our family that we have to know where something is going before bringing it home.)

I already knew what color I wanted to paint it. I wasn't sure about the fabric for the top. But since it was going in our bedroom I wanted it to at least complement if not match the current linens.

The hardest part was gathering all the materials needed to complete the project. And boy let me tell you these little things really add up. Especially if you don't buy the right yardage of foam and have to go back and get more. (Although I already have another plan for the shorter piece of foam.)

I really need to remember the old saying "Measure twice, cut once."

Materials:

Top:
Upholstery Fabric
1/4" Foam
Fabric tacks
Screws

Base:
Primer
Semi-gloss paint
Brush
Paint Thinner

The top came separately from the base. So the first step was to do a coat of the primer on the base. I decided it would be easier to paint the entire bottom rather then trying to figure out what bits would show and what would not.


 I also used a pinterest idea for the paint can. I used a rubber band around the can to drag the brush across to remove excess paint. It worked well except when you have to take it off. Then it pops and sprays paint everywhere. So either way you are getting paint on yourself. That's just how painting is...


I did one coat of primer on the entire exterior of the trunk. I didn't find it necessary to do the inside. If you were restoring an old trunk then it might be a good idea.


After I was satisfied that it was dry, I moved on to the paint. I got a dark grey semi-gloss paint. It was hard to find a black-black to match my bedroom furniture so I went I little lighter hoping it wouldn't clash too much.


The first coat went on slow but the second was much quicker. I was glad to be done with the painting. That to me was the most stressful part. I hate making such a mess. Actually making the mess isn't the problem it's the cleaning up that I dislike.

On to the top of the trunk. This part was what I was looking forward to. I had never done any upholstering. I read all kinds of blogs with tips, tricks and tutorials. But in the end I decided to do it my way. The kind of lazy, cheap, half-butted way I like to do things.


Choosing the fabric and foam was a long process. I went to two different fabric stores with a very patient friend. I wanted something that would last, not too trendy, something that would go with my linens but not be matchy-matchy. I decided to go with this old postage stamp look. Something about it just called out to me. I kept walking back to it in the store. Looking again and again. I'm sure I was driving my patient friend crazy. But I was happy with my selection once I left.

All I did was cut the foam to line up with the edges of the top. Then I cut the extreme excess off the fabric then draped around the edge of the top. I used fabric tacks to secure each corner. I went on side at a time and clipped off the extra fabric as I made my way around the underside of the top of the trunk.


I added more and more tacks. Till the top was secure and tight. I decided not to get too fancy and roll the edges under. I liked the worn look. And that's a lot more effort. I am lazy after all.


The last thing to do I requested help from my lovely husband. I had to screw on the top to the base.  It came with all the hardware. We just had to carefully line everything up and get the screws in the right place.

He carried it inside for me and sat it in front of my bed where I had imagined that it was going to sit.


I was very pleased with the final result.


So was the cat. He loves to sleep at the end of our bed. I just knew he would love the extra foot of space to stretch out and not be kicked accidentally at night. Because we have such a low set bed he is able to walk back and forth between the two surfaces. It's definitely his favorite project I have ever done. 

Whatever I can do to please the cat, I suppose.
Ha.

I really love my custom trunk. Thanks to those who encouraged and badgered me to get this project complete and to my mother in law to gifting me such a great project that I can be proud of for years to come.

Good luck on your next big project!

Sunday, August 5

Chicken and Broccoli Noodle Casserole

I don't know much about casseroles. My mom wasn't really into making them. We were more of a meat, starch and veggies as separate entities kind of family. But when Paul announced that he really loved broccoli I knew I needed more recipes that incorporate broccoli.
When I came across this recipes on Skinny Taste I knew I had to give it a try.

Chicken and Broccoli Noodle Casserole

 6 oz egg noodles
2 tsp oil
4 cloves garlic, sliced thin
12 oz fresh broccoli florets, chopped
1 tbsp butter
1 medium shallot, minced
3 tbsp all purpose flour
1-3/4 cups fat free chicken broth
1 cup 1% milk
12 oz cooked shredded chicken breast
4 oz shredded reduced fat sharp cheddar
cooking spray
3 tbsp shredded parmesan cheese
2 tbsp seasoned breadcrumbs

Cook noodles in salted water until al dente, or slightly undercooked by 2 minutes. Set aside.

Heat oil in a large skillet. Add garlic and cook on medium heat until golden, about 1 minute. Add the broccoli and a little salt, sautรฉ and cover the broccoli for about 3 minutes on medium heat until the broccoli begins to soften. Set aside.

Preheat the oven to 375°. Lightly spray a 9 x 12 casserole dish with cooking spray.

In a large pot, heat butter over medium-low heat, when melted add the shallot and cook until soft, 2-3 minutes. Add the flour and a pinch of salt and stir well, cooking an additional 2-3 minutes on medium-low heat.

Slowly whisk in the chicken broth until well combined over medium heat; whisk well for 30 seconds, then add the milk and bring to a boil. Simmer on medium heat, mixing occasionally until it thickens (about 6-7 minutes). Remove from heat and add reduced fat sharp cheddar and 1 tablespoon of the parmesan cheese; mix well until the cheese melts.

Add the shredded chicken, noodles and broccoli to the sauce and mix well until evenly coated.

Pour into a casserole dish and top with parmesan cheese and breadcrumbs. Spray a little more cooking spray on top and bake for about 20 - 25 minutes. Place the casserole under the broiler a few minutes to get the crumbs crisp and golden (careful not to burn).


This is another recipe that I love to use the crockpot shredded chicken that I mentioned in my previous post. The hardest part of this recipe is making the cheese sauce. Once you get that trick down its a breeze. Its an easy, hearty, healthy and tasty weeknight meal.

If you had some non-broccoli fans in your house you might try swapping it out for some peas or green beans. Or maybe even spinach. Every vegetable tastes better smothered in a cheese sauce!

So ditch the cream of whatever casserole starter and cook up something fresh for your family and yourself!

Saturday, August 4

Southwest Chicken Chili Mac

Back when I first started browsing pinterest I was mostly into finding ideas for dinners. Now I have a whole folder full of ideas for food stuffs and another full of ideas for sweets. I love moving a pin from one of those folders into my "tried" folder.
One of the reason I made a "tried" folder was so that I could remember that I loved this recipe for Southwest Chicken Chili Mac. I was so easy and tasty I knew that I had to put it on my list of things to make again and again.

Southwest Chicken Chili Mac
by Picky Palate

8 ounces wagon wheel pasta noodles (I have also used just macaroni noodles)
2 Tablespoons extra virgin olive oil
1 cup finely chopped white onion
1/2 cup finely chopped sweet peppers (or bell peppers)
1 tablespoon minced garlic
2 cups cooked shredded chicken breast
10 ounce can Rotel diced tomatoes, mild
1 1/2 cups reduced sodium chicken broth
1/2 cup corn, fresh or canned
1/2 cup white beans, drained and rinsed
1 Tablespoon chili powder
1 Tablespoon ground cumin
1 teaspoon dry Ranch seasoning from packet
1/4 cup finely chopped fresh cilantro (optional)
cheese for topping

1. Cook pasta according to package directions. Drain and run under cool water to stop cooking. Heat oil in 9 inch deep cast iron skillet. Add onions and peppers, cook stirring until softened about 5 minutes. Add garlic and cook stirring for 1 minute. Add chicken, tomatoes, broth, corn, beans, 1 cup wagon wheel pasta, chili powder, cumin, Ranch seasoning and cilantro. Stir until well combined. Reduce heat to low and simmer until ready to serve.


It might look like a lot of ingredients but they are all pretty common, low cost items.

Another tip for this post is a how to make the shredded chicken for this meal. Throw a few thawed or frozen chicken breasts in your crockpot cook on low 6-8 hours. You can add spices like cumin, garlic powder or chili powder too. Then shred with a fork. So easy.
Sometimes I'll plan to make this and another meal that requires shredded chicken in one week, that way I can cook up a few breasts at once and then have the protein ready to go.

This meal is differently an easy crowd pleaser. Try it for kids or even some picky adults.
This post is reminding me how much I like this recipe. I might just have to put this on the menu for next week! Enjoy!

Friday, August 3

Bacon egg muffin

So just for fun a few Sunday mornings ago I decided to combine a couple of ideas from pinterest and make a special breakfast for Paul. I made a concoction that I am dubbing a Bacon egg muffin.
I unfortunately did not write down any specific measurements for this recipe. Mostly because I was just playing around in the kitchen.

Bacon egg muffin

Bisquick mix
milk
2 slices bacon, cooked and cut up
2 scrambled eggs
cheese

Cook bacon and scramble eggs. Chop up bacon and let the bacon and eggs cool a bit.
Use the instructions on the Bisquick box to make drop biscuits. I made them a bit thinner by adding a little extra milk. Pour into a greased cupcake tin. Top with the eggs, cheese and a few bits of bacon.
Bake them per Bisquick instructions. Just keep an eye on them. Remove from tin and serve warm.


They were so cute and tasty. My batch made six. So we each got three which was a pretty big portion.
This recipe would be really fun for overnight guests in the morning. Especially if they are hitting the road as soon as they get up.
I actually forgot the cheese but I want to add it the next time I make these.

You could modify these in lots of ways. Syrup for more of a pancake muffin. Or salsa and spicy cheese for a Mexican muffin.
Why not give it a go? I love to play around in the kitchen. Sometimes that's where the best recipes come from.
Breakfast is a fun and easy meal to cook. The only problem is waking up early enough to make anything before lunch!

Monday, May 14

Succulent Braised Pork

Way back in January my sister came all the way from Oakland, CA to a conference that she goes to every year that happened to be in Charleston this year. I was super excited to be able to spend some sister time together and have her see our place. I didn't know how much I was really going to see her since she did have a conference to go to after all. On the last day she was giving a presentation so I knew with all that she would be pretty busy. Just in case she had time to eat with us, I planned a few what I would call "special meals" that I would be excited to share with a guest or a sister that I never get to cook for. One of these recipes was for a braised pork shoulder which just happened to be on sale at the grocery that week.

Succulent Braised Pork
by Melissa d'Arabian

2 pounds pork shoulder, cut into 6 large chunks
Salt and freshly ground black pepper
2 tablespoons olive oil
1 onion, chopped
2 celery stalks, chopped
1 carrot, chopped
1 clove garlic, roughly chopped
2 tablespoons tomato paste
2 tablespoons all-purpose flour
1 cup red wine
1 1/2 cups beef stock or broth
1 bunch parsley stems, tied with string
2 bay leaves
1 cup water

Preheat the oven to 325 degrees F. Pat the pork dry with paper towels and season with salt and pepper.

In a large Dutch oven, heat the olive oil over medium-high heat, and working in batches brown the meat on all sides until a golden crust forms. Transfer the pork to a plate. To the pan add the onion, celery, and carrot and sweat until softened, 5 to 7 minutes. Add the garlic and sweat another 2 minutes. Stir in the tomato paste and cook for 3 minutes to cook off the raw flavor and caramelize it. Sprinkle with the flour and cook another 2 minutes to cook off its raw flavor. Whisk in the wine and reduce it by half. Return the pork to the Dutch oven, then stir in the beef stock, parsley stems, and bay leaves. Add the water if liquid does not come up to the top of the pork. Do not cover the pork with liquid. Cover the pan and place it in the oven to braise until the meat is fork tender, about 3 hours. Taste and season with more salt and pepper, if needed. Transfer to a serving platter and serve.


Sorry this picture is so lame. But I was so excited to eat the pork I totally forgot to take the picture till there was only one bite left!

This meat is so tender and packed with flavor. I like to serve it with some roasted potatoes or mashed potatoes, something to soak up the delicious juices that are left in the pot.

If you need a special meal for a special guest try this one. Or just in the mood to make something tasty for yourself. It is a slow cooking kind of meal, I would suggest making it on your day off. But it is worth the time. If you can handle smelling tasty pork all day, then go for it!

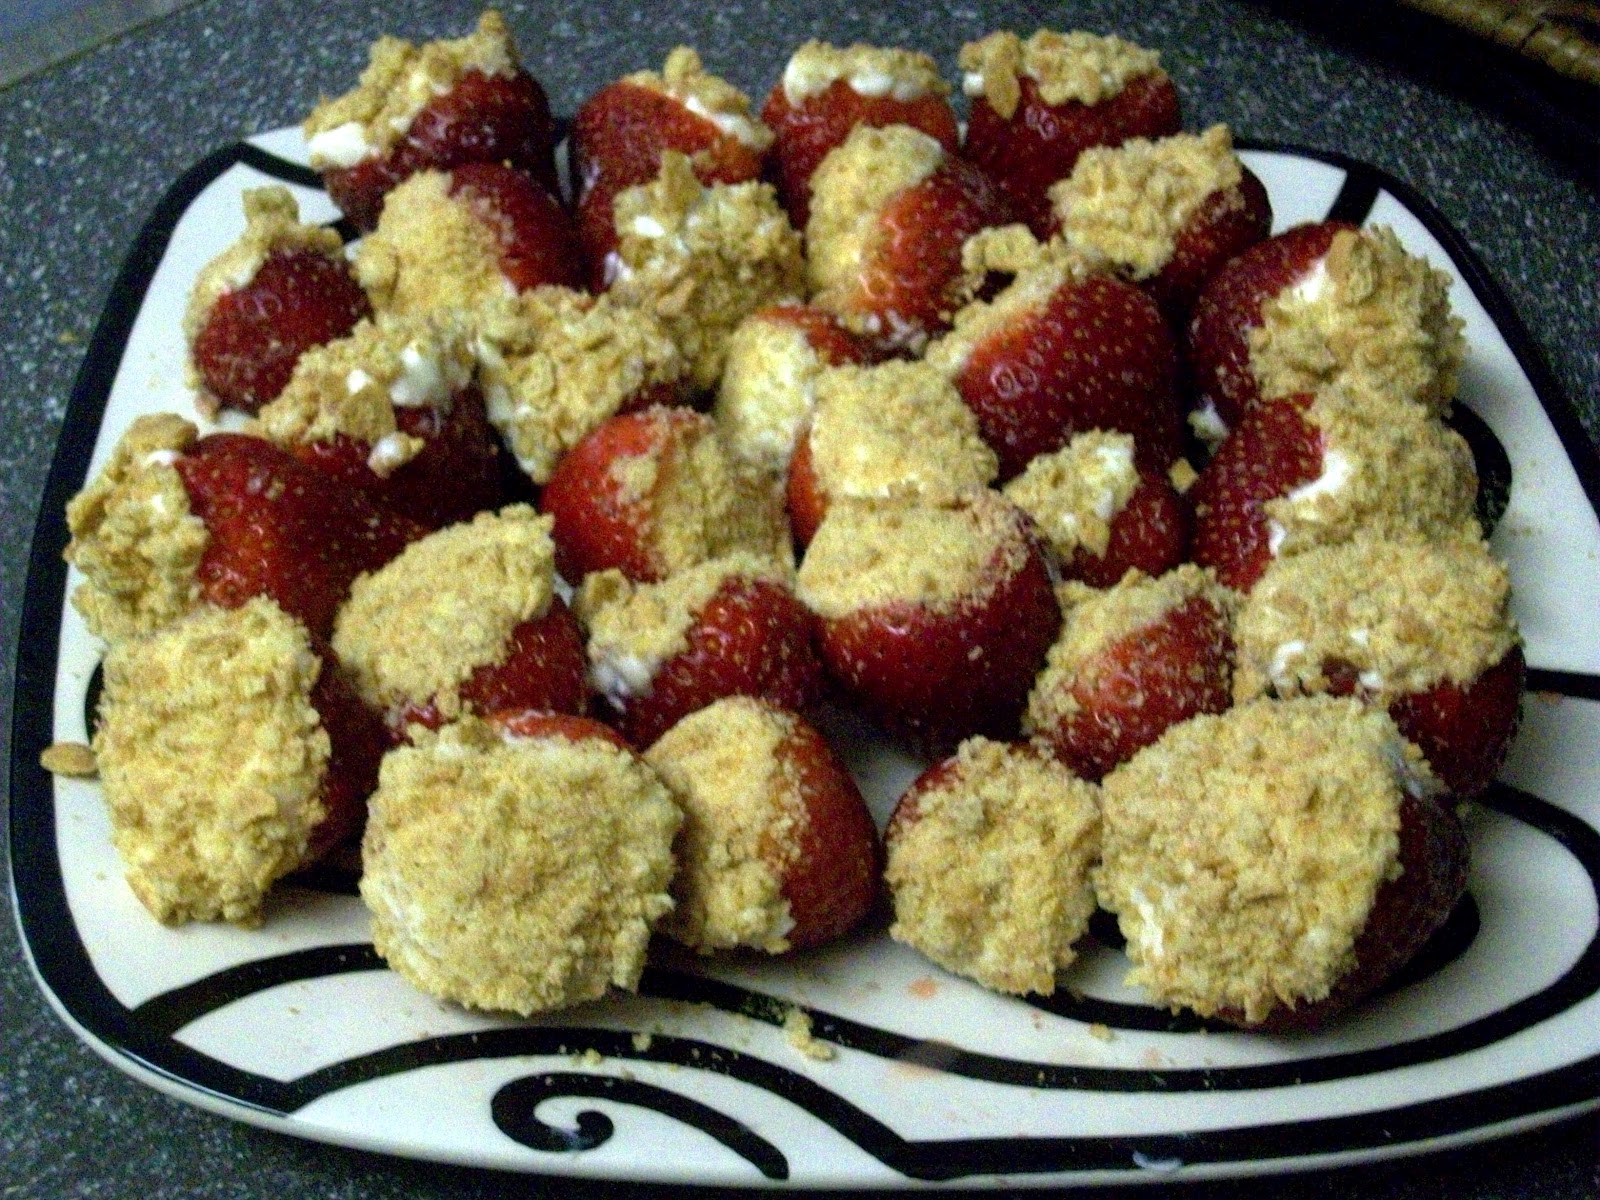
Strawberry Cheesecake Bites

All right I know that pinterest is old news by now. But as I sit here and obsessively pin things I realized that I had several new recipes to post. I figured even though I have been busy/lazy with my blog its never too late to post. I wanted to get the ball back rolling with an idea I found on pinterest.

I saw these before Paul's birthday and I just knew this had to be the first thing I tried from pinterest. With strawberries coming into season in the lowcountry and Paul loving cheesecake.

Strawberry Cheesecake Bites
by SugarDeby via pinterest

1 carton of strawberries
8 oz pkg softened cream cheese
1/2 cup powdered sugar
1/2 tsp vanilla
1 sleeve of graham crackers, crushed

Wash, cut off the top of the strawberries and then core them out. Be sure to take out enough of the core to get a healthy amount of the cheesey filling inside.
For the filling: Beat the cream cheese. Add powdered sugar and vanilla. Beat until smooth.
Fill the strawberries: Use a piping bag or a zippy bag with a corner cut off. Pipe them nice and full and dip them in the crushed graham crackers.


Mine aren't that pretty but they were a big hit at his birthday get together. We were all stuffed full of strawberries and cheesecakey filling. They might look like small bites but between a few people it was a lot of dessert!

This pin was honestly a little laborious for me. (But I was happy to do it for Paul.)

So if you haven't checked out pinterest yet or your trying to decide if its worth signing up. Do it! They are some great ideas and its an awesome way to keep all of your ideas organized. I have a whole "board" full of ideas that I have tried, that way I don't lose the information so I can try it again and again.

Monday, March 12

Baby Shower Gift Ideas - Diapies!

So first off sorry for the unintended and unwanted hiatus from posting. But don't worry just because I have not been posting my crafting and cooking definitely does not mean that I have been idle finding and producing new ideas.

I think the first I would like to share is some excellent ideas for a baby shower gifts. (I also have another idea in progress, thanks to my mom, that I will hopefully complete soon.)

The first one I can take no credit for, my friend Jessica made these for her first baby. Probably because she couldn't find any burp clothes that were stylish enough for her little boy. Plus she is an insatiable crafter just like me!

These are what she named "Diapies"! Because they are made from pre-fold cloth diapers.

This whole process could not be simpler and more fun!
(Well picking out the fabric is my personal favorite part.)

I asked the mom to be what her nursery or baby colors or pattern preferences were. She told me "cupcakes, butterflies, pink and ponies". So this is what I came up with...


12 diapies with 3 patterned fabrics. I even remembered to laundry them before I gift wrapped them!


This is a view of them unfolded to show you how huge they are! Big enough to protect any shoulder from the occasional to not so occasional post feeding spit up. Trust me they were very well tested with my friend's baby and they work awesome. And not just for burp clothes but the random spill cleaner upper or make shift bib even. I'm sure there are tons of uses but that is all I can come up with at the moment...

Sure you could just buy the pack of pre-fold diapers and call them diapies, but without that extra cute fabric touch its just not the same.

I promise its an easy sew.
  • Just cut the fabric the same with width and shape as the middle of the pre-fold with an added 1/4" sew allowance around all sides. 
  • Iron under all the edges.
  • Sew a straight or even zig-zag sew all the way around. 
This is so easy that its gets tedious after the first five, then its just like an assembly line production.

This will not be an unwanted gift. Even a first time mother will appreciate the need for a good set of burp clothes. And no one else will have brought any quite like it. Even if you have super crafty friends, the chances of picking the same fabric are almost 0%, really.

But I'm not done yet! I bought an extra pattern of fabric, because it was so darn cute, while getting fabric for the diapies. Then I suddenly realized, "What am I going to do with this?!"

I searched the internet and etsy even pinterest looking for ideas. Then standing in a craft store I remembered seeing a project on Little Miss Momma a while back featuring a fabric memo board. Okay I can do this. Trying to remember what I need from looking at this post about 3 months ago, I bought corkboard and ribbon and found a few cute buttons in my stash. When I actually looked up the post, it was not at all how she made it, so from there is became my own creation.


  • I hot glued the fabric onto the corkboard.
  • Then I crisscrossed the ribbon also securing with hot glue. 
  • Then the buttons, yes I also hot glued them. 
It doesn't quite work for a plush memory board, but it is a corkboard so tacks will work. (Even though I felt silly saying it, I did warn the mom to be not to put this near the baby's crib, between the buttons and tacks I didn't want to harm her first born.)

Also I used a different color of the same patterned fabric to make her name in plush letters. 
  • I just chose a font on Word that I liked.
  • Printed the letters nice and big and cut them out.
  • And used that as a template to trace onto the wrong side of the fabric. 
  • Finally I sewed and stuffed like any old plushie.

Another cute idea would have been to make the whole alphabet in plush letters but after these three projects I ran out of time till the baby shower.

So I gave you not 1 not 2 but 3 ideas for do it yourself baby shower gifts. I expect you people to get out there and start sewing for your mom and dad to be friends!

Or at least appreciate these cute ideas and smile when you look at the adorable fabrics.

Monday, February 6

Jalapeno Chicken

This dish is infamous among our group of friends here in Charleston. There is a restaurant called Madra Rua where they serve as one of their daily specials Jalapeno Chicken.

I had heard about this for weeks when we first moved here last year and finally demanded to be let in on the Jalapeno Chicken secret. It was an experience I will never forget, especially the time one of my friends ordered extra cheese and they brought it to her in a small soup bowl! (Once you read though the recipe you might gather an understanding of why this is so disturbing.)

Anyway I made it one night after having leftover cheese dip I made for a party and it was a big hit. I think I was able to capture the general spirit of the dish with my rendition. I just had to write up the recipe and share it. Hopefully some of you out there will be able to enjoy the awesome that is Jalapeno Chicken for yourselves now!


Jalapeno Chicken

Cheese sauce:
1 block of velveeta
can of rotel, tomatoes and chiles
1/4 lb. ground beef
cumin, to taste
cayenne, to taste
paprika, to taste
salt and pepper
sliced pickled jalapenos

Chicken:
chicken breasts
salt and pepper
olive oil
cooked rice


Add velveeta to crockpot, allow to melt then add the rotel.
While cheese is melting saute ground beef in pan with tablespoon of oil. Allow meat to brown while breaking into small pieces. (A good trick is to add a 1/4 cup of water to the meat. That helps break up the meat really small which is ideal for the dip.) As it browns add seasonings, cumin, cayenne, paprika and salt and pepper. After it browns drain off any oil, then add to cheese mixture. Then add jalapenos. Mix well.

Season chicken with salt and pepper. Either grill or saute chicken breast with oil olive.

Lay down a bed of the cooked rice, then cooked chicken breast, finally spoon on cheese mixture.


Sunday, December 25

Christmas cookies - Mint cookies

Throughout the year I am not generally into cookies. I figure there are a lot of better ways to waste some calories on sweet treats then a mere cookie. Between that an my hatred for baking, fresh baked cookies don't appear too often in my home.

Thinking back this was the time of year that fresh baked cookies would make an appearance in my family home. So I thought I would continue the tradition.


We would decorate cookies every year and leave some for Santa.


With a note and milk of course. We also left a few carrot sticks for the reindeer. We knew that not everyone remembered to leave the reindeer snacks.

Decorating cookies isn't really what I wanted to post about though. I just wanted to share a few nostalgic photos.

What I really wanted to share is a few recipes that I think of as Christmas cookies. The first is one from my mom's recipe book. I tried to make these myself this year and had a huge fail! They still tasted okay but there was too much butter and the cookies spread out waaaay too much. (maybe next year...) The other recipe I found on foodnetwork.com and had great success with. This recipe is going in my recipe book. They are both excellent recipes. Just like with any other baked good remember to not be lazy like me and measure carefully. Ha.

Melt-Away Peppermint Wreaths

1-1/4 c. butter, softened
3/4 c. sifted powdered sugar
2-1/2 c. all purpose flour
3/4 teaspoon peppermint extract
red and green food coloring

Cream butter, gradually add sugar beating well.
Add flour and mix well. Stir in peppermint extract. Divide dough in half and place in separate bowls. Tint half with the red food coloring and the other half with the green.
Roll dough into balls using 1/2 teaspoon dough per ball. For each wreath-shaped cookie, place 6 balls in a circle on ungreased cookie sheets, alternating colors. Press together securely. Bake at 375 degrees for 8 minutes.
Let cool for 10 minutes; remove to cooling racks and cool completely.


I divided the one of the dough balls in half again and left it white to also make candy cane shapes. This picture was taken before they went in the oven. Sadly I wasn't able to take a good shot of them after they came out. Actually looking at the picture I may or may not have made the balls too big as well. Oops.
These cookies are true to their name, they will melt in your mouth. A sweet buttery taste with the sharp tang of peppermint give these cookies a Christmas-y feel. The cute shapes only reinforce the holiday theme. They are a definitely classic in my book.

Delicate Mint Sandwich Cookies
by Melissa d'Arabian

Cookies:

1/2 cup unsalted butter, softened
2 ounces cream cheese, softened
3 tablespoons granulated sugar
1 1/4 cup all-purpose flour

Mint Filling:

1/2 cup confectioners' sugar
2 tablespoons butter, softened
1 or 2 drops mint extract
1 or 2 drops red or green food coloring

Confectioners' sugar, for dusting, optional

For the cookies: Preheat the oven to 375 degrees F. Cream the butter, cream cheese and sugar until smooth using a handheld mixer in a medium bowl. Add the flour slowly, mixing on low, until incorporated. Scoop the dough into a ball using your hands and cover with plastic wrap. Refrigerate until the dough has firmed slightly, about 30 minutes.
On a floured surface, roll the dough about 1/8-inch thick. Cut out as many rounds as possible with a small cookie cutter and transfer to ungreased baking sheets, leaving about 1 inch between each cookie. Re-roll the dough scraps and repeat until all the dough is used. Use a smaller cutter, about 3/4-inch, or cut freehand with a small sharp knife to punch a small window out of half of the cookies. Place the cutouts on the baking sheets.
Bake until golden around the edges, 12 to 15 minutes. Cool for 5 minutes on the baking sheets and then transfer to wire racks to cool completely.
For the filling: Place the sugar, butter, mint extract, food coloring and 1/2 teaspoon of water in a medium bowl and beat on medium speed until well combined and fluffy. Spread a thin layer of mint filling on the cookies without the windows and place the wafers with the windows on top. Sprinkle with the confectioners' sugar, if using, and serve the sandwich cookies with the cutout cookies on the side.


 A friend of mine has a picture of the ones I made. I used a star shaped cookie cutter and I did not do the cut out part. I also doubled the recipe for the frosting. When I made it looked like a few tablespoons of frosting. Haha. I knew that wasn't enough.
I, my friends, Paul and my parents loved these cookies. They are as titled delicate cookies. Not too sweet of a cookie which pairs well with the sugary frosting. Even though they are pretty labor intensive, I would like to make these again soon. Because they were really that good. But I am glad I was making them with my friend so that we could chat and cut up while making them.

Even if baking is not your thing, Christmas is a great time to flex those muscles. You can give them as gifts to those hard to buy for coworkers or take them to a church cookie walk or just enjoy them for yourself with a tall cold glass of egg nog.

Oh and Merry Christmas!

Wednesday, December 21

Mushroom Ragu

Okay so I LOVE pasta. I am always searching for the next new pasta recipe to get obsessed with. Every week I am browsing foodnetwork.com, recipe books and food blogs, to come up with dinner ideas. Anytime I come across a pasta recipe that even remotely looks good I'm all over it. This recipe popped up on foodnetwork.com's homepage one day and I was instantly interested.
I know that there will be plenty of people that will overlook this recipe because its all about the mushrooms. But come on mushrooms are such an amazing ingredient! They are earthy, meaty, chewy and take on all kinds of flavors that are added to the mix. They are a versatile ingredient that I am always excited to find new and different ways to use them.
When I read through this recipe I knew that I wouldn't be able to find some of the mushrooms that it was calling for. Usually that would cause me to pass up the recipe all together. But it popped into my head that I could use a dried mushrooms and then use the liquid that I reconstituted them in as a replacement for the chicken broth. That would add even more mushroom-y flavor. So I decided to give it a try.

Mushroom Ragu
by Giada De Laurentiis

1/4 cup extra-virgin olive oil
1 large onion, chopped
2 garlic cloves, minced
1 pound mixed mushrooms (cremini, oyster, shiitake) chopped 1 package of dried Monterey mushroom mix, chopped & 8 oz baby bella mushrooms, chopped
Salt and freshly ground black pepper
1/2 cup Marsala white wine
2 cups chicken mushroom broth
1/3 cup heavy cream
5 fresh basil leaves, chopped
1/4 cup flat-leaf Italian parsley, chopped
1/2 to 3/4 cup grated Parmesan


Reconstitute the dried mushrooms according to package instructions. Reserve liquid and chop mushrooms.
In a large skillet heat the oil. When almost smoking, add the onions and garlic over medium-low heat until the onions have wilted, about 8 minutes.
Add the mushrooms and season with salt and pepper. Raise heat to high and saute until mushrooms are tender and all the liquid has evaporated. 
Remove pan from heat and pour in Marsala white wine. Return pan to stove and allow wine to evaporate, about 3 minutes. 
Add chicken mushroom broth and simmer for 1/2 hour until the sauce has reduced by half. 
Add heavy cream and mix well. 
Take the pan off the heat and add the fresh herbs and Parmesan and mix thoroughly. 


I can't explain in a just a few words how delicious this pasta is. Other then saying that my original picture was so lame because it was a small second helping that I swiped out of the pan before it was all gone. Well I did save some for lunch the next day, because it reheats so well. I have already made this recipe twice since I found it. I'm sure Paul is already over eating it. But its so easy and so tasty that I can't help putting it on the menu.

So don't tell me how you don't like mushrooms, blah blah blah, if you don't bother to try this recipe. Just do it! You'll be glad you did and if you aren't just ship it to me. Ha!

Sunday, December 11

Choosing a Christmas Tree

Honestly one of my favorite parts of the holiday season is the Christmas tree. Its so iconic, fun and it even smells Christmas-y.
When we moved to North Carolina in 1995, our family started a tradition to drive to the mountains and go to a "choose and cut" Christmas tree farm. My parents would let me and my sister loose and we would run and race to see who could find the best tree first.
It was a difficult process, between my mom and dad there were many rules and specifications to the perfect tree. The height and width were the first, but certainly not the only. Branch density, trunk width, needle type, color, fullness of the branches, and shape of course. I don't mean to make my parents sound strict. There was nothing mean or harsh about the way they evaluated the trees. It was a great game we played. We'd shout to each other across the lot announcing that we had found the perfect tree. Then everyone would gather around and check out the whole 360 degree view. We would all touch, look at, smell and even shake the tree (to see if a lot of needles would fall off, that's bad, means the tree is dried out and probably dieing). It was very exciting if the tree you found was the chosen one.
Then my dad would whip out his saw and cut it down, or the lot workers would do it for us. My  parents would go through the whole trial of dragging it to the car and tying it on top of the car. My mom would hold her breath all the way home just waiting for it to break out of its intense bondage and fly off the roof of the car. Us kids would always be useless with the getting the tree inside and setting it up. That was left to my parents again. There would be needles flying all over the house and we would trot behind waiting to see it put into place.
Some years my dad would even let us choose a tiny tree that we were allowed to put in our room to decorate. It was usually the most Charlie Brown looking tree on the lot or just one he would cut down in our own woods for us.


Dad was in charge of the lights every year. He would struggle to untangle the mess of wires, test every bulb and finally artfully and evenly string them around the tree. This was not something the kids generally helped with either.
It wasn't until the ornaments that we got involved again. Then its all hands on deck. Each person has certain ornaments that are "theirs". My mom always insists that the girls put on all of "our" ornaments. Dad has one or two that he is forced off the sofa to place on the tree. Mom does whichever ones are left and of course her Georgia ornaments. This part is filled with Christmas tunes, hot cocoa, maybe even cookies, and lots of stories of Christmas times past. We talk about all the ornaments as we put them on the tree. They all have meaning and stories. I love this part of the holiday. Even when I pretended that I was too cool for it. This really makes me feel like its Christmas. My mom to this day still likes my sister and I to put a few of "our" ornaments on the tree. Even if the rest is already decorated.

This year Paul and I traveled to several different places to get a tree. We finally found a great tree with our friends. Like I told my friend after looking at two vendors across town for a tree, the tree will stand out to you. Its almost like your wedding dress, you just know. There is nothing you can find that's wrong with it. Its just the right tree.


I put the lights on it. Paul was making chili for dinner.


Oh well not a great picture. But as you can see oooooh lights. After eating dinner and some cookies and buckeyes were made, then we could start the decorating process.


Ah thank you Paul for the picture of my booty. Anyways, we don't have as many great ornaments as my parents. But we do have a few of special ones. Paul has a pickle he loves and mug of beer he just acquired. I have some wreaths my great-grandma crocheted, a few fleur de lis, an owl, and a whale from the Monterey Bay Aquarium. We even have some joint ornaments which is pretty good since this is only our third "married" Christmas. We have a portrait ball of Paul, me and the cat, Paul's parents got us last Christmas, a black sheep (that we put up as a family tradition because we aren't going to our parents' home for Christmas), and two shells from our cruises. All the glittering, twinkling and shinning makes me smile.


Now it feels like Christmas here. Even if there is no snow and its still 50 degrees!

Okay so this wasn't a post about any cute craft or tasty recipe. But more then that how to create the holiday spirit in your home. Just remember that even if everything doesn't go "perfectly" you can still make some lovely memories. I'm sure if my parents were telling this story they would remember some very different things then I do. But in the end its the feeling you get that leaves the biggest impact on your memory.